Navigating the Proposals Page
The Proposal Page in Elevation Advisor is your central hub for managing every proposal you've created. As you begin building and sending proposals, it will populate with a running list of every job you've quoted. This view helps you quickly find, sort, and take action on proposals at every stage of the sales process.
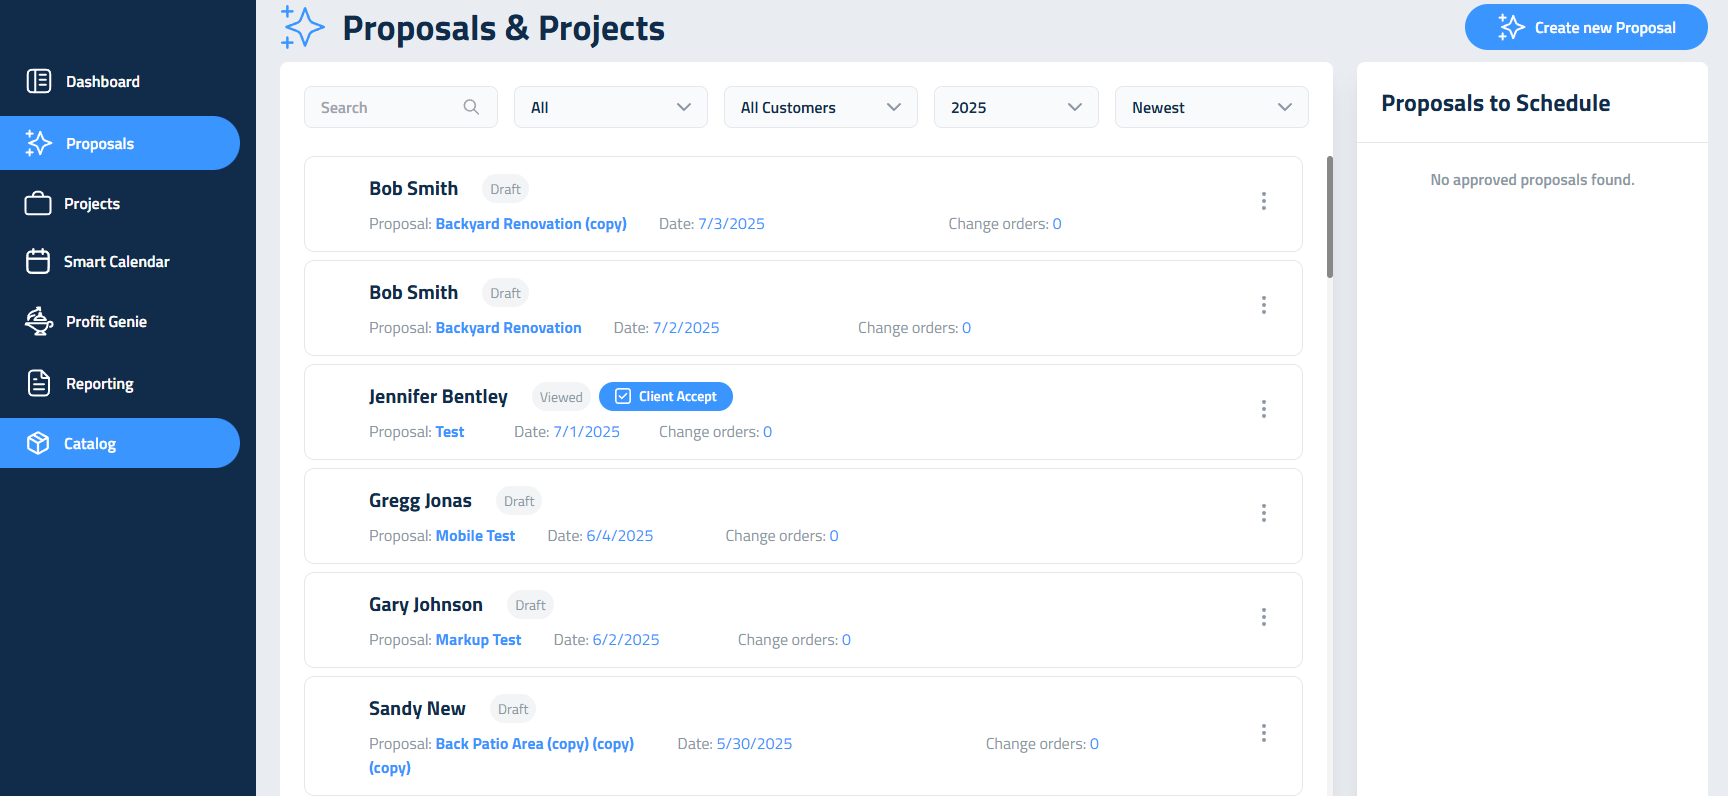
At the top of the screen, you’ll find a search bar where you can type in a client’s name or other unique information to locate a specific proposal. To the right of that is the "Filter by Status" dropdown, which lets you sort proposals based on where they are in the sales journey:
- Draft: Proposals you're still working on and haven’t sent yet. These are editable and flexible as you finalize measurements, materials, and packages. In draft mode, you will see the date the draft was created.
- Sent: Proposals that have been sent to the client but not yet opened. These are locked from editing but can still be resent or printed. You will see the date the proposal was sent to the client.
- Viewed: Proposals the client has opened but hasn’t accepted yet. This status helps you gauge engagement.
- Accepted: Proposals the client has signed off on with the date of acceptance noted; these move automatically to the "Proposals to Schedule" list, signaling that it's time to begin planning the work. You will see the date the client accepted the proposal.
- Rejected: The proposal has been rejected by the client with the date of rejection noted.
You can also filter proposals by customer name using the Customer dropdown. This shows your full client list, which is especially useful for repeat clients or managing multiple jobs under the same name. You can scroll through the list or type a name here to quickly find a client.
The year filter allows you to see proposals created in a specific year. If something seems to be missing, check that this filter isn’t limiting your view. Next to that, you can choose to sort proposals from newest to oldest or vice versa, depending on your workflow preferences. This is especially helpful when reviewing activity across seasons or comparing sales trends.
Each proposal in the list has a three-dot menu to the right, and the options that appear depend on the current status of that proposal. This menu provides fast access to core actions.
If the Proposal is in Draft you will see:
- View Project Folder: Access all project-related files like photos, videos, or documents attached during takeoff or proposal creation.
- Edit Proposal: Make changes before the proposal is sent, including pricing, templates, and packages.
- Duplicate Proposal: Create a copy of the proposal, useful for similar projects, seasonal re-quotes, or showing clients multiple options.
- Delete Proposal: Permanently removes the proposal. This action cannot be undone, so use it only when absolutely certain the proposal is no longer needed.
If the Proposal Has Been Sent or Viewed you will these additional items:
- Create PDF: Generate a clean, printable version for in-person presentations, mail-outs, or backup.
- Resend Proposal: Quickly resend the proposal email if the client misplaced it or needs a reminder. This maintains the same proposal link and access.
If the Proposal Has Been Accepted you will see these additional items:
- Create Change Order: Add new work, upgrades, or changes after the client has signed. This maintains proposal integrity while adapting to evolving project scope.
- Update Packages: If your client wants to upgrade to a higher-tier package, this allows you to make the change easily. Elevation will automatically generate a change order reflecting the new selection, preserving the original record.
These tools ensure you're never locked out of managing a proposal as it moves forward, while still preserving the integrity of what the client has already seen or signed. They also provide a seamless workflow from lead to close to production.
Once you're familiar with these tools, you're ready to keep proposals organized and actionable.
Updated on: 01/09/2026
Thank you!