Gravel Walkway
If this is your first time working in landscape sections, we recommend reviewing the Beds article first. It walks you through the basics and uses the same sample project referenced here.
In the Elevation Advisor Sample Design, there’s a gravel walkway located in the blue-outlined Patio Area.
Adding the Gravel Walkway Section
If you haven’t already added a gravel walkway:
- Click Edit in the top right corner.
- Select Gravel Walkway from the template library.
- Click Save to add it to your proposal.
Entering Measurements
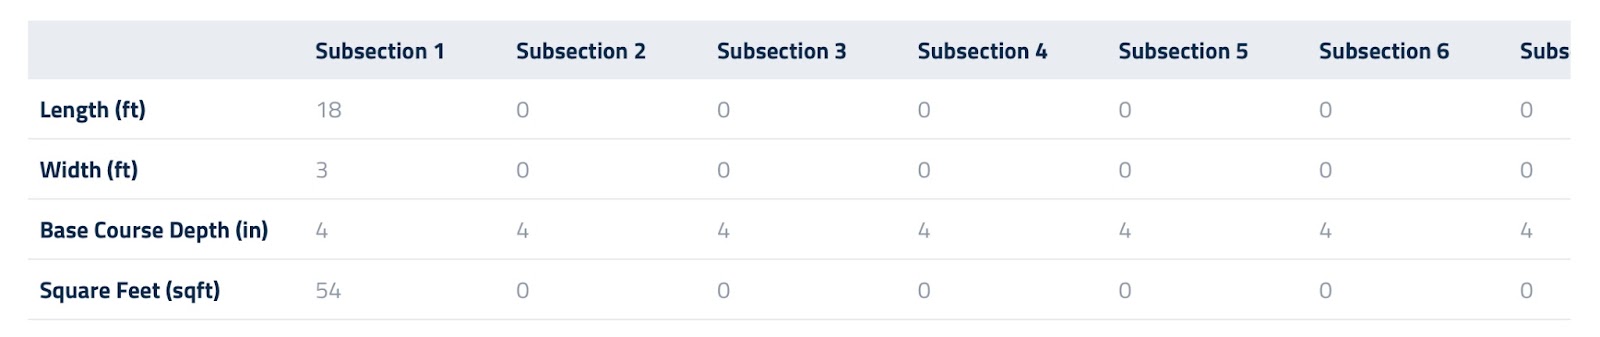
Open the Gravel Walkway section and enter the length, width, and depth in the measurements grid.
- In our example:
- 18’ x 3’ walkway
- 4” base course depth
This depth applies across all subsections, but you can adjust each one manually if needed. The system will automatically calculate the square footage and gravel quantity in yards.
If your walkway is irregular or you have more than one, use subsections to include all measurements. This example only includes one walkway.
Materials & Labor
Scroll down to the Materials/Labor section. You’ll see three preset line items:
- Subgrading/Subgrade Compaction
- Base Course
- Weed Fabric

Subgrading/Subgrade Compaction
- No material is assigned here, it only calculates labor.
- By default, the system uses 1 minute per 10 sqft.
- To adjust, click the blue edit button.
Base Course & Weed Fabric
- Click Connect Item to assign the specific product.
- In our example, we used ⅝" Minus Basalt for the base course.
- If you don’t need one of the presets, click the blue edit button and press Delete.
Finalizing the Section
Once materials are set, you can:
- Change Crew Size, Add labor, equipment, or subcontractors.
- Enter a Description of Services to explain the scope of work.
- Add Crew Notes for internal communication.
If you need help with these steps, refer to the Beds article, which walks through the process in detail.
Updated on: 11/06/2025
Thank you!