How to Customize Landscape Work Areas in a Proposal
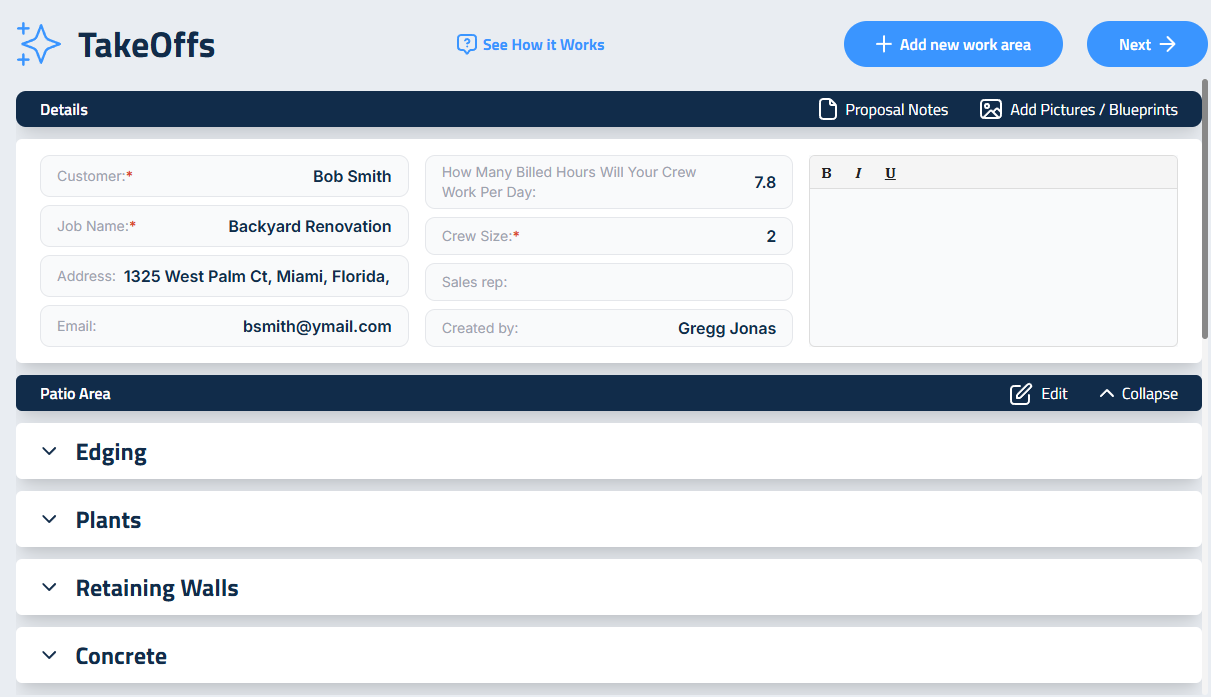
After setting the general parameters of your project, click Next to proceed to the Proposal Takeoffs screen. Here, you’ll see each of your Landscape Work Areas displayed in dark blue headers. Under each header is a list of the Sections you previously added to that area.
To view or hide the details of a Landscape Work Area, click the expand/collapse arrow on the right side of the blue header. This allows you to manage each area individually without cluttering the screen.
Editing Landscape Work Areas and Sections
To make changes to a Landscape Work Area:
- Click the Edit button on the blue header.
- To remove the entire area, click Delete Area.
- To add a new Landscape Work Area, click the blue + Add New Work Area button at the top or bottom of the screen.
To add or remove individual Sections within a Work Area:
- Click the same Edit button.
- Use the red X next to each Section to remove it, or select new ones to add.
- Click Save to apply your changes.
Working Within Sections
To open or close individual Sections within a Work Area, use the expand/collapse arrow on the left side of each Section line. This reveals the input fields where you can enter detailed information for that Section.
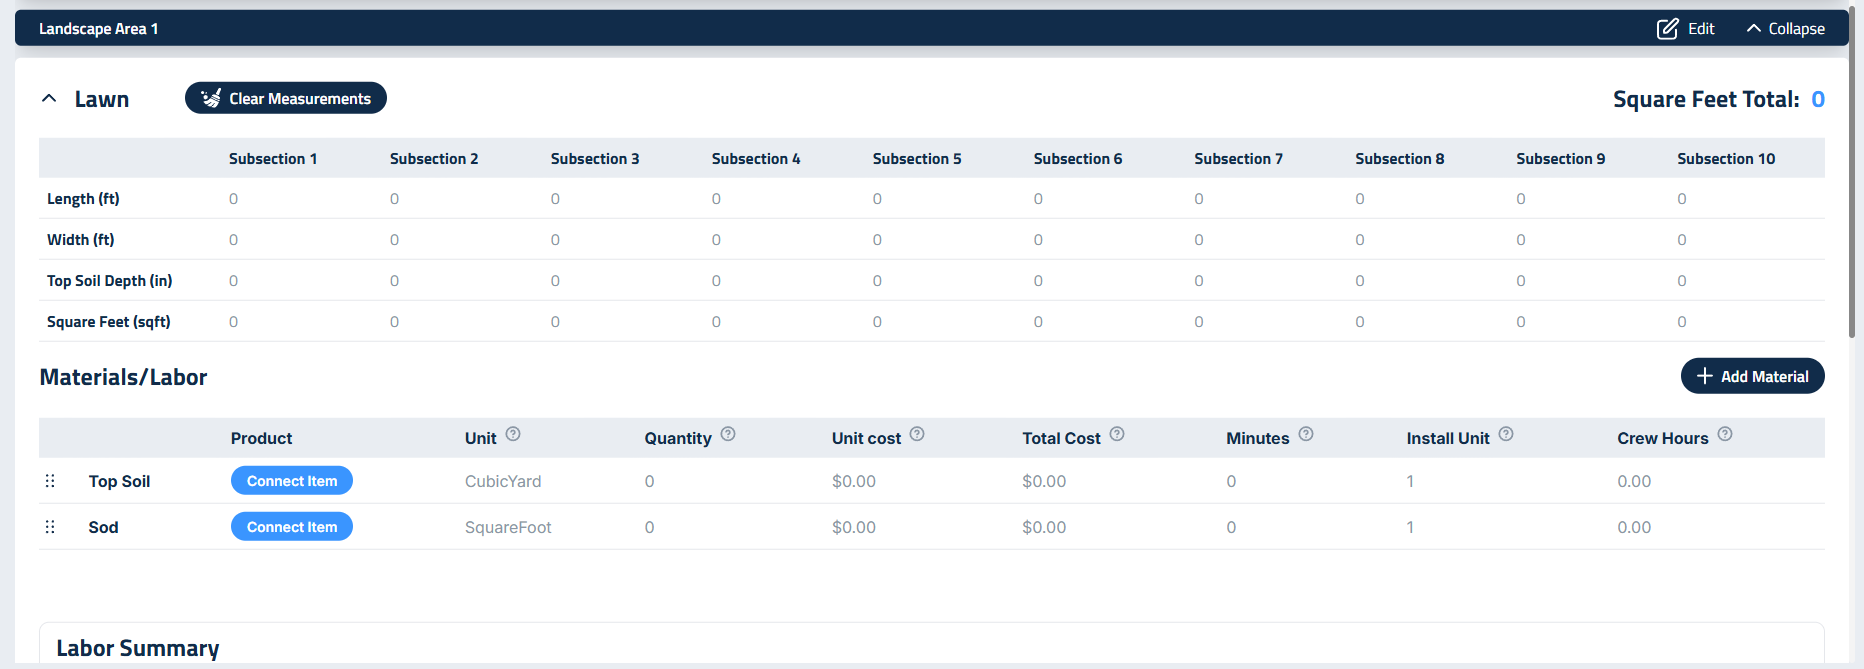
Most Sections include a Measurements area, where you’ll input quantities using fields tailored to the type of Section selected. Use Enter to move down one cell and Tab to move right once cell.
Below the measurements is the Materials/Labor section. This is where you connect materials to the Section using the Add Material button.
To specify which exact product will be used:
- Click the Connect Item button next to each material.
- Use the sidebar to search your Materials Catalog. You can also
- You can search by name or filter by category.
Add a Custom Section
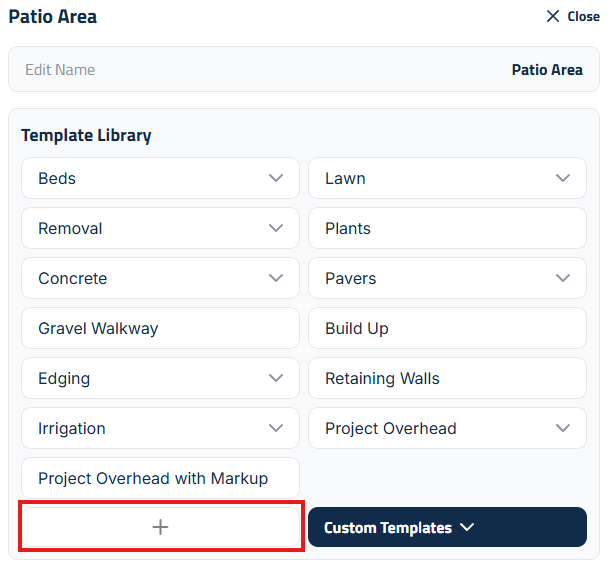
If your design includes a feature not listed in the prebuilt Sections, like a Firepit, you can create a custom Section by clicking the edit button for any Area:
- Click the plus (+) icon next to the Sections list.
- Type the name of the new Section (e.g., “Firepit”).
- Press Enter to add it to the Work Area. Then Save.
This allows you to include unique elements in your proposal that aren’t part of the default library.
Using Custom Groups
Custom Groups are part of Elevation Advisor’s Integrated Sales and Psychology Strategy (ISPS), a system designed to improve sales effectiveness by simplifying how proposals are presented.
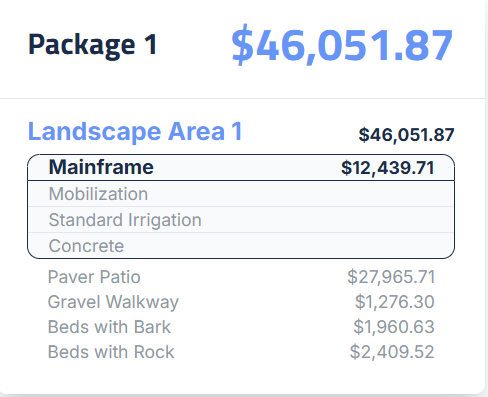
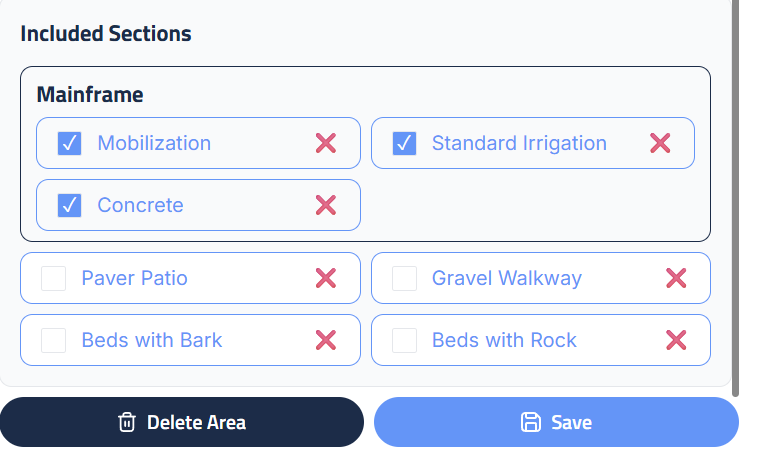
This feature allows you to bundle multiple Sections together and present them to the client as a single line item with one price. For example, in the image shown, Mobilization, Irrigation, and Concrete are grouped under a Custom Group called Mainframe, with a single price of $12,439.71. This approach reduces negotiation friction and helps minimize sticker shock.
To create a Custom Group:
- Click Edit on the Landscape Work Area you want to modify.
- In the sidebar, check the boxes next to each Section you want to include in the group.
- Double-click the Custom Group header and rename it to whatever you want the client to see in the final proposal. In the image we chose to name our Custom Group Mainframe.
To edit your Custom Groups or Sections later, simply click the Edit button on the blue header of the corresponding Landscape Work Area.
Updated on: 11/06/2025
Thank you!