How to Use Invoicing
The Invoice Client page is where a signed proposal turns into a clear payment story for you and your client. At any moment, everyone can see what the job costs, what has changed, what has been paid, and what's still ahead. That clarity is what builds trust.
Clients show up on your Projects page automatically once they accept a proposal, so there's nothing to set up before you start.
Getting Started
On the Projects page, click Invoice Client on the project card (or in its three-dot menu).
The left side of the page is the Payment Summary. Pick a start date next to Date, then click Start Invoicing. Every payment date is set from that one date, so you don't have to date each invoice yourself.
Not ready to start the schedule, but need the deposit? Click Record downpayment only. That creates the down payment invoice now and leaves the rest of the schedule for later.
The Original Contract
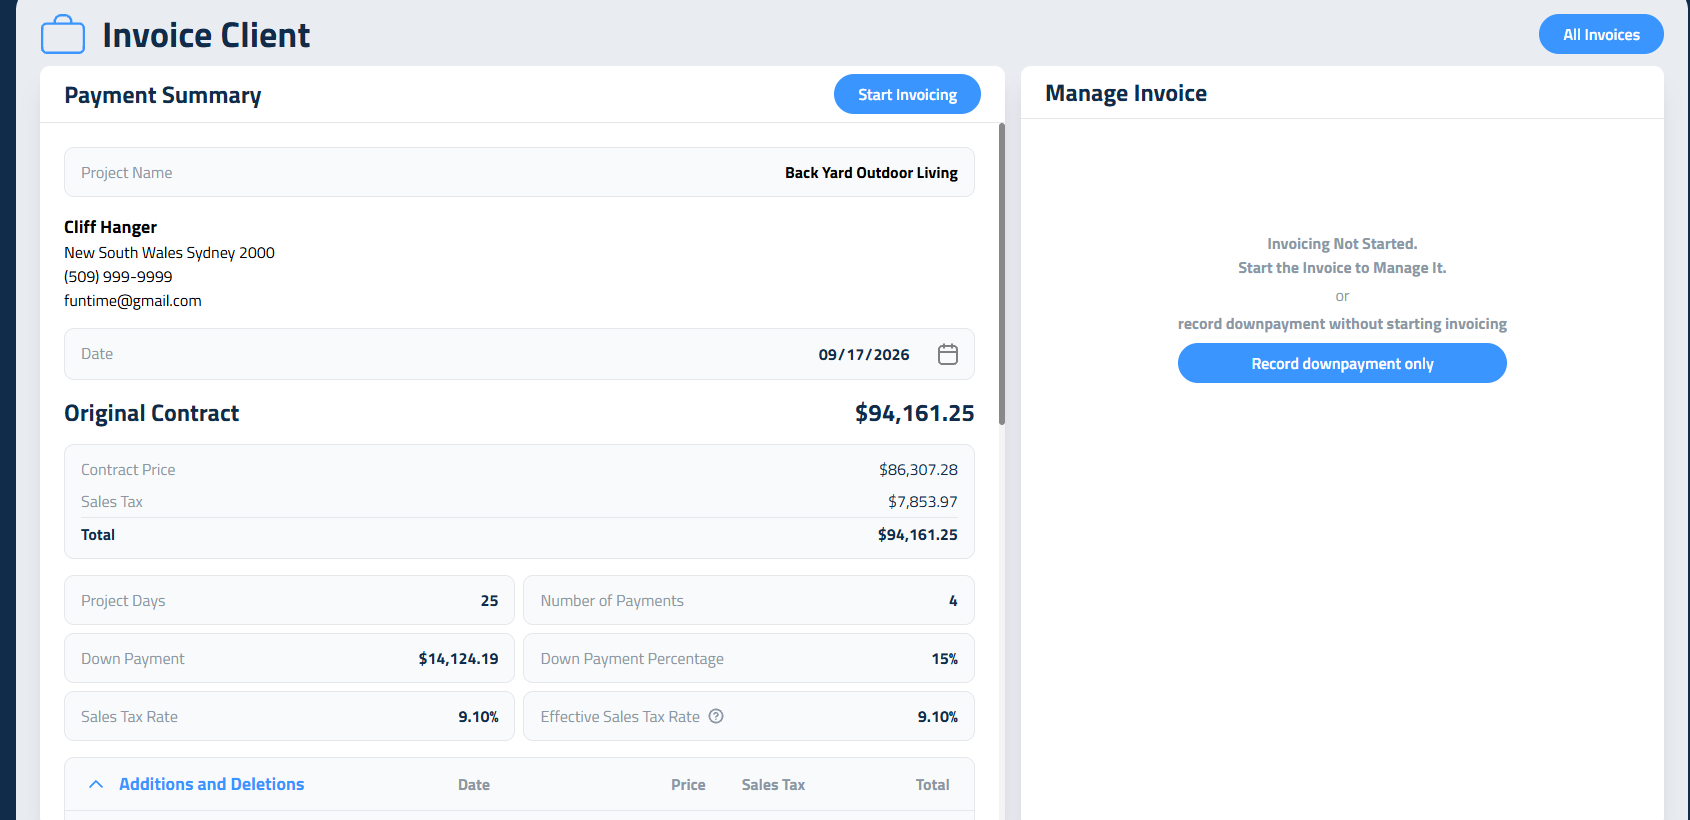
The accepted proposal appears under Original Contract, with its Contract Price, Sales Tax, and Total. Change orders are handled separately further down the page.
Below it are the terms that shape the schedule:
- Project Days: how long the project is expected to take
- Number of Payments: how many payments the contract is split into
- Down Payment: the deposit, in dollars
- Down Payment Percentage: the same deposit as a percent
- Sales Tax Rate and Effective Sales Tax Rate: the rate you set, and the rate that actually applies once non-taxable items are taken into account
How the Down Payment Works
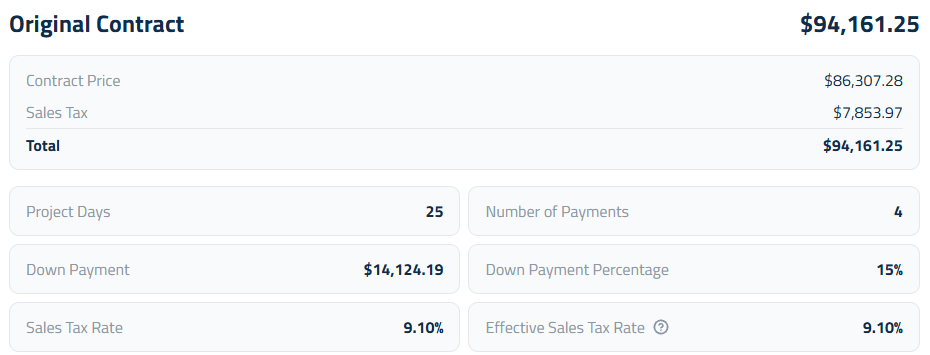
The down payment is the most misunderstood part of any payment plan, so here it is plainly: the down payment is not an extra payment. If you agreed to six payments, your client makes six payments. The down payment is the first slice of Payment 1.
It does two jobs at once. It gets the job onto your calendar, and it counts toward Payment 1. Elevation Advisor compares the down payment to one standard payment (the contract total divided by the number of payments) to decide how Payment 1 is billed.
When the down payment is smaller than one payment (the usual case), Payment 1 goes out as two invoices:
- The down payment, when the contract is accepted.
- The balance of the first payment, when work begins.
For example, on an $87,428.96 contract with 15% down over six payments, each payment is $14,571.49. The down payment is $13,114.34, so the balance of the first payment is $1,457.15. Payments 2 through 5 are $14,571.49 each, and the last payment is $14,571.51.
When the down payment is as large as one payment or larger, it covers Payment 1 by itself. There's no balance-of-first invoice, and everything still owed is split evenly across the remaining payments. At 30% down on that same contract, Payment 1 is $26,228.69 and the other five payments are about $12,240 each.
Either way, the number of payments stays exactly what you set. A large down payment makes the rest of the schedule smaller than the first payment. That's intended, not a rounding problem.
Collecting a down payment is standard practice. If you aren't asking for one yet, we strongly encourage it for your own financial security.
Change Orders: Additions and Deletions
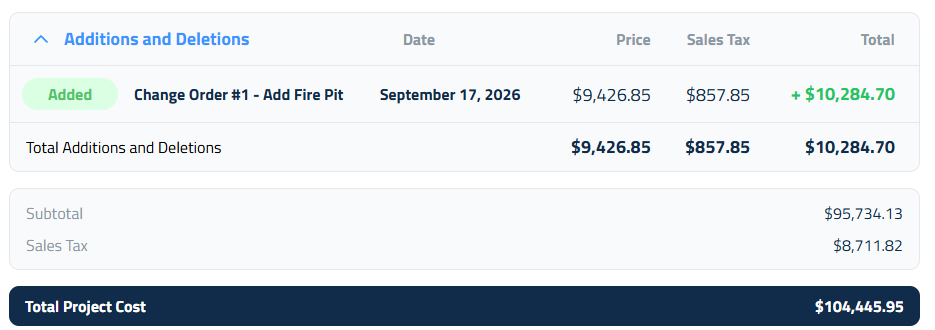
The Additions and Deletions table lists every accepted change order with its Price, Sales Tax, and Total, so you can see what each one added or took away. The updated price of the whole job, with every change order included, appears next to Total Project Cost.
How a change order reshapes the schedule
- Your new total. The original contract plus every accepted change order becomes the new Total Project Cost.
- The change order down payment comes first. If you collect a down payment on the change order, it's billed as its own invoice on the next open date.
- What's still owed. Everything already invoiced, the change order down payment, and any credits are subtracted from the new total.
- The payments ahead. Payments that haven't been invoiced yet, plus any additional payments the change order adds, share what's still owed evenly.
The important promise: invoices you've already sent never change. A change order only rewrites payments that haven't gone out yet. Your client is never surprised by a number moving on an invoice they're already holding.
Change order before work starts. If a change order arrives after the down payment but before work begins, the balance of the first payment keeps its original amount and still goes out when work starts. Only Payment 2 onward is recalculated.
Change order after everything is billed. If the job is fully invoiced and the client asks for more, the change order needs at least one additional payment, because there are no payments left to spread it across.
Two kinds of down payment, on purpose
- The original down payment is an early slice of Payment 1. It doesn't add a payment.
- A change order down payment is extra money billed now, on top of the recalculated schedule.
A change order with no down payment works the same way with the deposit set to zero.
Deducts (negative change orders)
A deduct lowers the total, and the amount still owed shrinks across the remaining payments. A deduct never carries a down payment. If a deduct is big enough to wipe out everything still owed, that's a refund, so handle it with your client directly rather than expecting new invoices.
For more on pricing change orders, see Using the Change Order Payment Calculator.
Credits
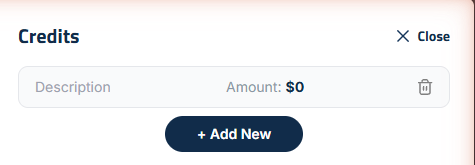
To credit a client, click Manage Credits. Give each credit a description and an amount, click + Add New for more, and click Save Changes. Credits appear in the Credits table with a Total Credits line, and they reduce what's still owed on the schedule.

The Schedule
The Manage Invoices table lists every payment with its Invoice #, Due date, Amount, Paid, and Status. The final payment may be a cent or two different from the rest. It absorbs the rounding so the whole schedule matches the contract to the penny.
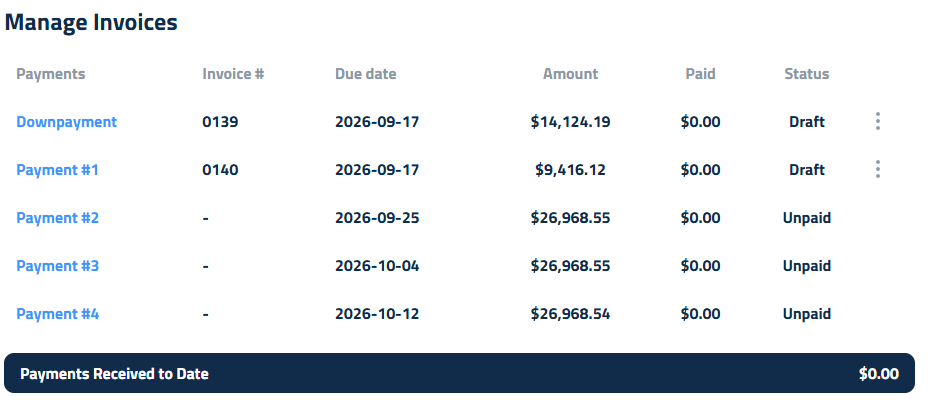
A payment that hasn't reached its date yet shows Invoice Pending. The invoice is created, as a draft, on its scheduled date. Need to bill it early? Click the row, then Update Schedule, and the next invoice is created right away.
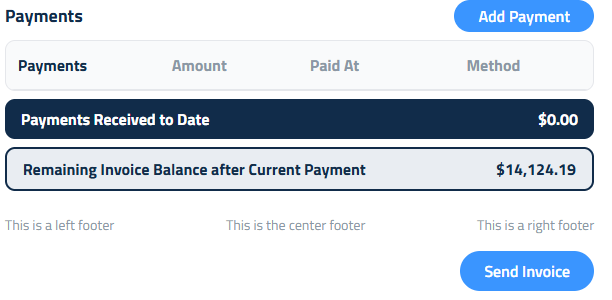
Below the table you'll see Payments Received to Date and Remaining Balance after Current Payment.
Working With an Invoice
Click any invoice in the schedule to open it on the right. You'll see the invoice number, status, invoice date, due date, and amount due, with Create PDF at the top.
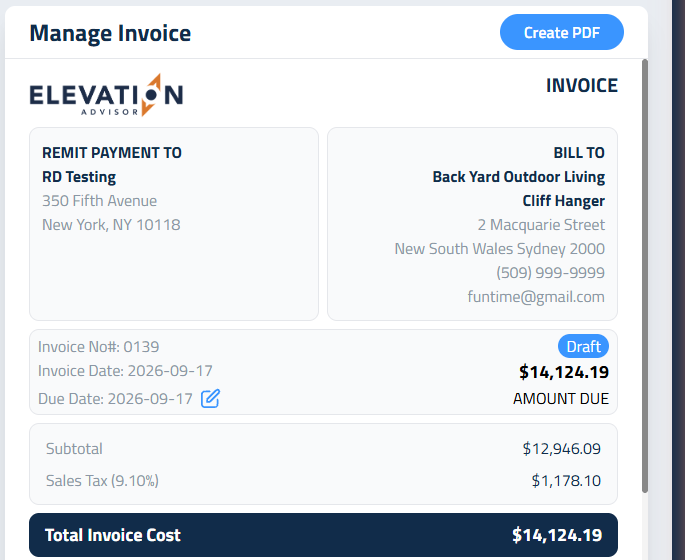
Changing the due date
While an invoice is still a Draft, click the pencil icon next to Due Date to change it. The change applies to that one invoice only.
What each invoice shows
Every invoice states its own tax: Subtotal, Sales Tax with the rate, and Total Invoice Cost. Progress invoices stay focused on that one payment.
The final invoice tells the whole story of the job in one place: the original contract, every change order, Total Project Cost, a Previous Payments list, what's been paid, credits, this invoice's Total Invoice Cost, and the Remaining Project Balance.
Pay Online and a note to your customer
If you've connected Stripe, a payment link is added to each invoice automatically when it's created, so your client gets a Pay Online button to pay by card or bank transfer. The link always charges what's still owed on that invoice, not the full amount if part of it has already been paid. The Payment link section on the invoice shows the link, and you can Recreate it or Remove Link.
If a link couldn't be created (for example, Stripe is still verifying your account), the invoice is still created without one, and you can click Create Payment Link later.
Below it, Note to customer lets you add a short message for this invoice only (up to 500 characters). It shows on the PDF and on your client's invoice page, and it locks when you send.
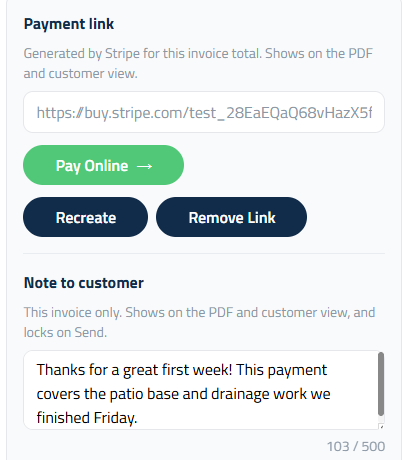
If the invoice amount changes after a payment link was made, you'll be asked to create a new link before you send, so the link never charges the wrong amount.
Already sent an invoice without a link? You can still add one to a sent or partly paid invoice. Click Create Payment Link, then send the invoice again so your client gets a copy with the Pay Online button. The copy they already have doesn't include it.
Sending an Invoice
When an invoice looks right, click Send Invoice at the bottom of the invoice panel. Your client gets an email titled "A new invoice was issued by your company!" with the due date and a Click to view invoice button. The invoice page shows the full invoice, your note, and the Pay Online button if there's a payment link.
Once sent, the button changes to Resend Invoice, which is your quick signal for what has already gone out.
Sent invoices are locked, so double-check the due date and note before you send. A payment link is the one thing you can still add afterward.
Recording Payments
To record money that came in by check, cash, or transfer, open the invoice and click Add Payment. Enter the Payment amount, pick the Paid On date, and click Record Payment.
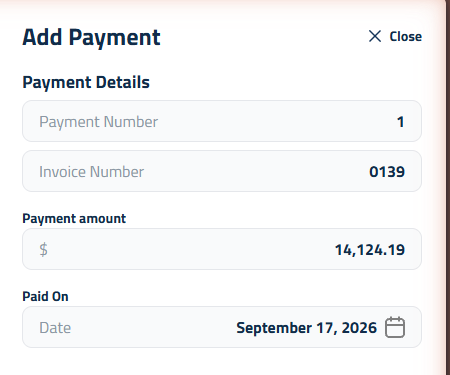
- If the client paid less than the invoice, the status becomes Partially Paid and the rest stays tracked.
- When the full amount is in, the status becomes Fully Paid.
- Recorded a payment by mistake? Click the trash icon next to it and confirm. The invoice goes back to its earlier status.
Payments your client makes with Pay Online are recorded for you, including the card or bank account used. A bank transfer shows as pending until the bank clears it, which usually takes a few business days.
If you use QuickBooks, recorded payments sync automatically.
Progress Billing Export for Commercial Jobs
Commercial work is often billed by percent complete against a schedule of values, in the general contractor's own spreadsheet or portal. For those jobs, find the Progress Billing panel at the bottom of the Payment Summary and click Export CSV.
You'll get a spreadsheet named after the job with:
- Job details at the top: customer, job name, address, phone, email, current project total, sales tax rate, down payment, number of payments, project days, and the export date.
- Every line item priced out: item number, source (Original Contract or the change order it came from), section, line item, price, tax, and price with tax.
Amounts are plain numbers with no dollar signs or commas, so the file pastes cleanly into Excel or a GC billing portal. Add your own percent-complete and amount-due columns there for each billing cycle.

Updated on: 09/17/2026
Thank you!