Plants
If this is your first time working in landscape sections, we recommend reviewing the Beds article first. It walks through the basics and uses the same sample project we’ll be referencing here.
In the Elevation Advisor Sample Design, plants are being added to the bark mulch beds in the garden area. This section walks you through how to add plants to your proposal quickly and accurately, while keeping your workflow flexible and organized.
Adding the Plants Section
If you haven’t already added a Plants section to your proposal:
- Click Edit in the top right corner
- Select Plants from the template library
- Click Save to add it to the bottom of your Included Sections
Importing Measurements
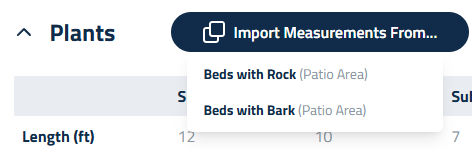
When you open the Plants section, you’ll see a button labeled Import Measurements From…. This allows you to pull in the square footage from another section, like Beds, so you don’t have to re-enter it manually.
Below the measurements grid, there’s a field to define plant spacing, the distance you want between each plant. This spacing value is used to calculate how many plants will fit within the measured area. Elevation Advisor segments the space into a grid of squares.
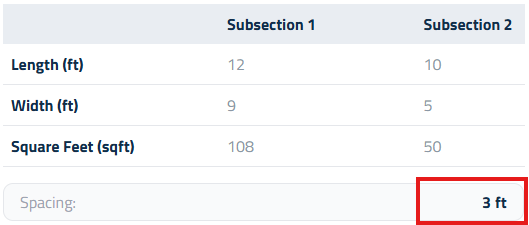
Based on the number of feet you specify, and places a plant at each corner of every square. For example, if you enter 3 feet, the system will divide the area into 4’ x 4’ squares and position a plant at each corner, ensuring even distribution across the entire bed. This helps you quickly estimate quantities and maintain consistent spacing throughout your design.
Adding Plants
Because plant selections vary widely from project to project, Elevation Advisor doesn’t include any preset materials in this section. Instead, you’ll build your list using your own catalog.
To begin:
- Expand the Plants section using the dropdown arrow
- Click + Add Materials
- Most companies will select the Nursery category to view their plant list
- You can refine the list using Subcategories or Groups if you’ve set those up in your Materials Catalog
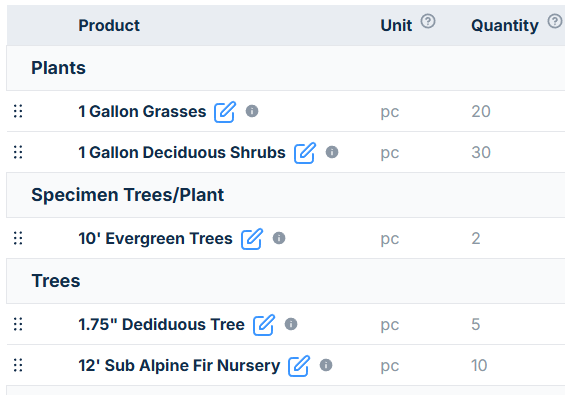
As you add items, you’ll be prompted to enter a quantity and assign each plant to a group:
- Plants
- Specimen Trees/Plants
- Trees
- Hedge
- Misc
Organizing and Editing Items
If you didn’t enter a quantity when adding a plant, click the blue Edit button next to the item to add one. You can also drag and drop items into the correct group if needed.

- Click the zero value next to the first item
- Enter the quantity and press Enter
- The cursor will automatically move to the next item
- Repeat for the remaining plants
Templates can also be a huge time-saver in this section. If you frequently install the same plant combinations, like a native pollinator mix or a formal hedge layout, you can save your setup as a Custom Template and reuse it in future proposals.
Finalizing the Section
Once materials are in place, you can:
- Change Crew Size, Add labor, equipment, or subcontractors
- Enter a Description of Services to explain the scope of work
- Add Crew Notes for internal communication
If you need help with these steps, refer to the Beds article, which walks through the process in detail.
Updated on: 11/06/2025
Thank you!