Retaining Wall
If this is your first time working in landscape sections, we recommend checking out the Beds article first. It walks through the basics and provides a more detailed look at creating sections in Elevation Advisor.
Adding the Retaining Wall Section
To begin:
- Navigate to your proposal and click Edit in the top right corner.
- Select Retaining Wall from the template library.
- Click Save to add it to your project.
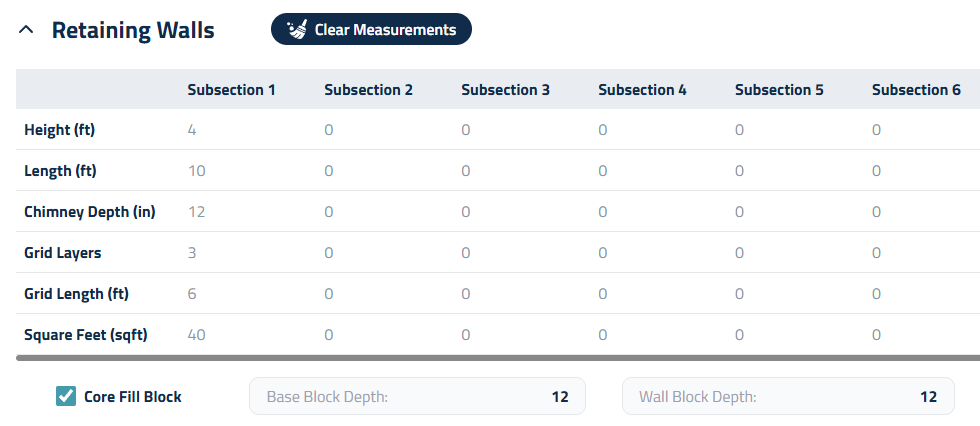
Once the section is added, follow these steps to input wall details accurately:
- Height and Length of the wall (e.g., 4' H × 10' L).
- The software will automatically calculate the square footage.
- Chimney Drain (a vertical drainage system),
If your design includes a chimney drain (a vertical drainage system), enter its depth in inches. If not, leave this field at zero.
- Geogrid Layers
Specify the number of layers and the length of each layer (e.g., three layers at 6 feet).
Use subsections to capture variations in wall height or features.
Check the Core Fill Block box if you're using gravel or similar fill inside the block cavities. Then, enter:
- Base Block Depth (typically 10–12 inches for a 4-foot wall)
- Wall Block Depth (commonly 10–12 inches for standard retaining wall blocks).
Materials & Labor Setup
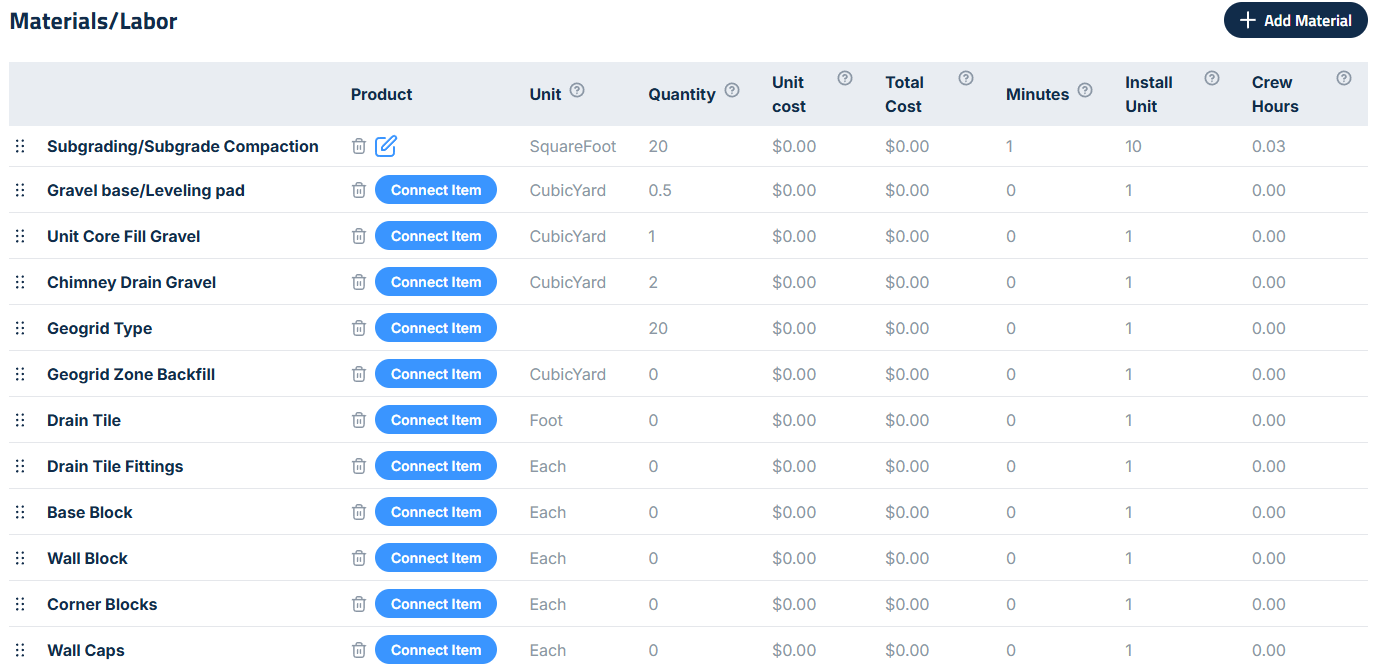
Scroll to the Materials/Labor section to configure the components of the wall.
- The system includes a preset for Subgrading/Subgrade Compaction, which calculates labor time for soil preparation.
→ Default: 1 minute per 10 square feet
→ You can adjust this value by clicking the blue edit button.
To assign materials:
- Click Connect Item and choose products from your materials catalog.
To customize the list:
- Use the Edit button to remove or modify preset line items.
- Click Add Material to include additional components.
Finalizing the Section
Once materials are set, you can:
- Change Crew Size, Add labor, equipment, or subcontractors
- Enter a Description of Services to explain the scope of work
- Add Crew Notes for internal communication
If you need help with these steps, refer to the Beds article, which walks through the process in detail.
Updated on: 06/27/2026
Thank you!