Using the Project Budgets Page
The View Project Budget section is your go-to tool for tracking and managing materials for a specific job, broken down into Work Areas and sections. It gives both office staff and field crews a clear picture of what's already been ordered, what still needs to be ordered, and what's on-site. While anyone can access this page, it's especially useful for crew leads working in the field.
Getting to a Project Budget
You can open a Project Budget from a few places, so you're never more than a click away:
- Projects page: click View Project Budget on any project card.
- Project Folders: click Project Budget at the top of the folder.
- Smart Calendar: click a project on the calendar, then click View Project Budget in the project overview.
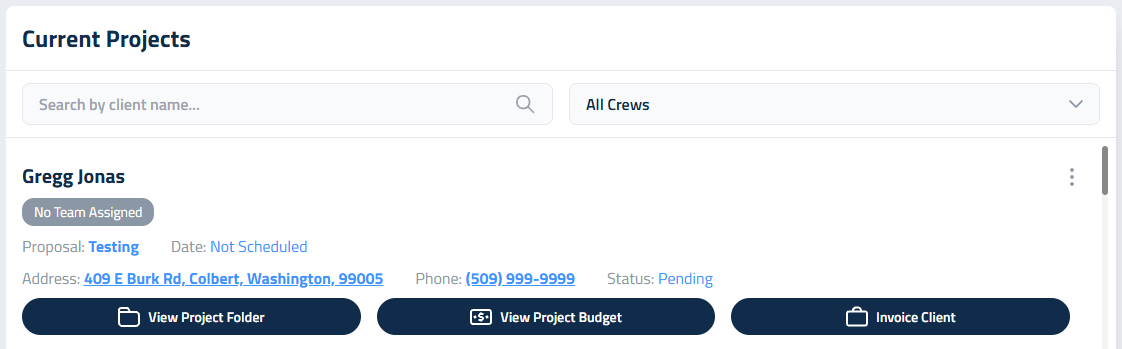
Running a lot of jobs at once? On the Projects page, use the search bar to find a project by client name, or use the crew dropdown to show only the jobs assigned to one crew. Choose No Team Assigned to find the jobs that still need a crew.
Once you're on the budget, the buttons in the top-right corner take you where you need to go next:
- Supplier Call Sheet opens your ordering report (covered below).
- Project Folders opens this project's files, so you can check a plan or a photo without losing your place.
Crew Notes
Crew Notes are designed to improve communication between the office and field teams. You can add Crew Notes during the proposal drafting phase to clarify expectations and provide context for each section of the job. Once the proposal is accepted it is locked. Crew Notes are then managed in the Project Budget page.
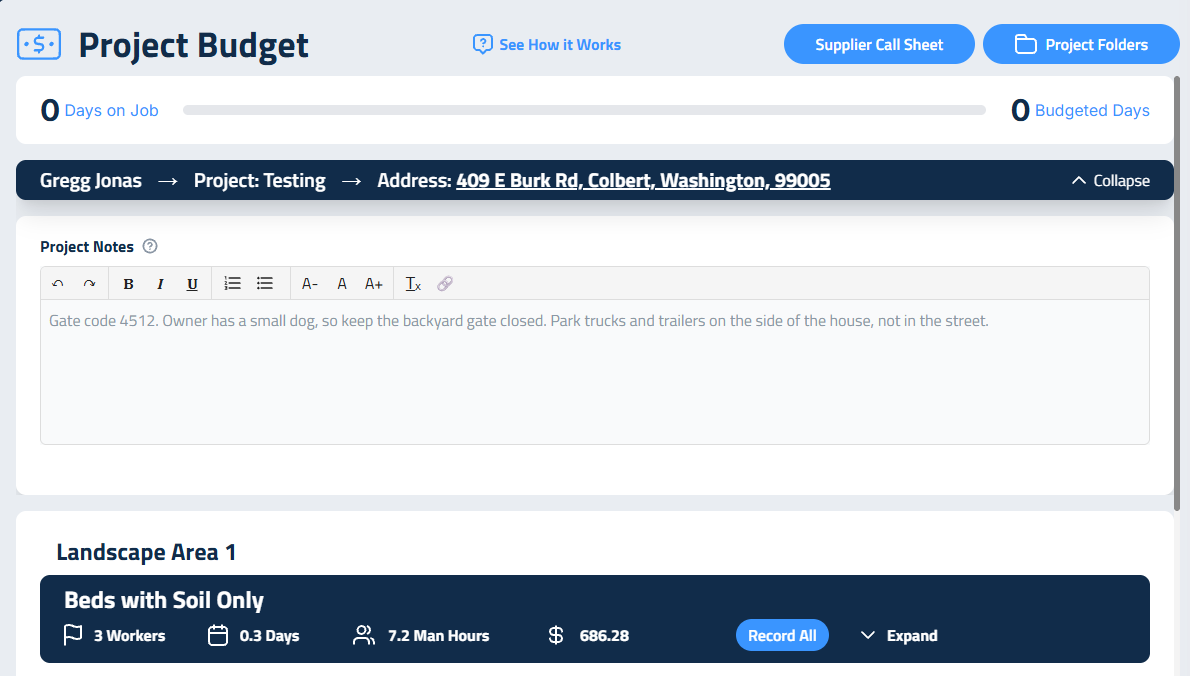
The Project Notes section at the top of the Project Budget page is designed for project-level instructions that help the crew navigate job-specific logistics. These notes are ideal for sharing important context such as:
- Gate codes or access instructions
- Parking guidelines (e.g., "Please park all vehicles and equipment on the side of the house")
- Neighbor concerns (e.g., "Do not block the street, neighbors have complained")
- Safety reminders or site-specific cautions
Description of Services and Crew Notes
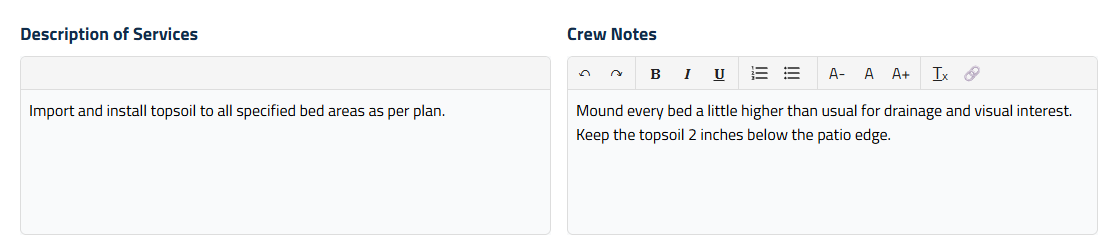
When you expand a section, two panels sit side by side at the top:
- Description of Services (left) shows the scope of work for that section, exactly as it was written in the proposal. It's read-only here, so what your crew sees always matches what the client signed. If the section has no description, you'll see "No description added."
- Crew Notes (right) is where the office tells the field what the job really needs: not just the daily to-do list, but the overall vision and the client's expectations. For example:
Please ensure all planting beds receive larger than average mounding to create enhanced visual interest and improved drainage throughout the landscape. Additionally, confirm that all mulch is applied at a consistent 3-inch depth, keeping it pulled back from plant stems and tree trunks to prevent moisture issues.
Crew Notes save automatically when you click away from the box.
Working with Sections
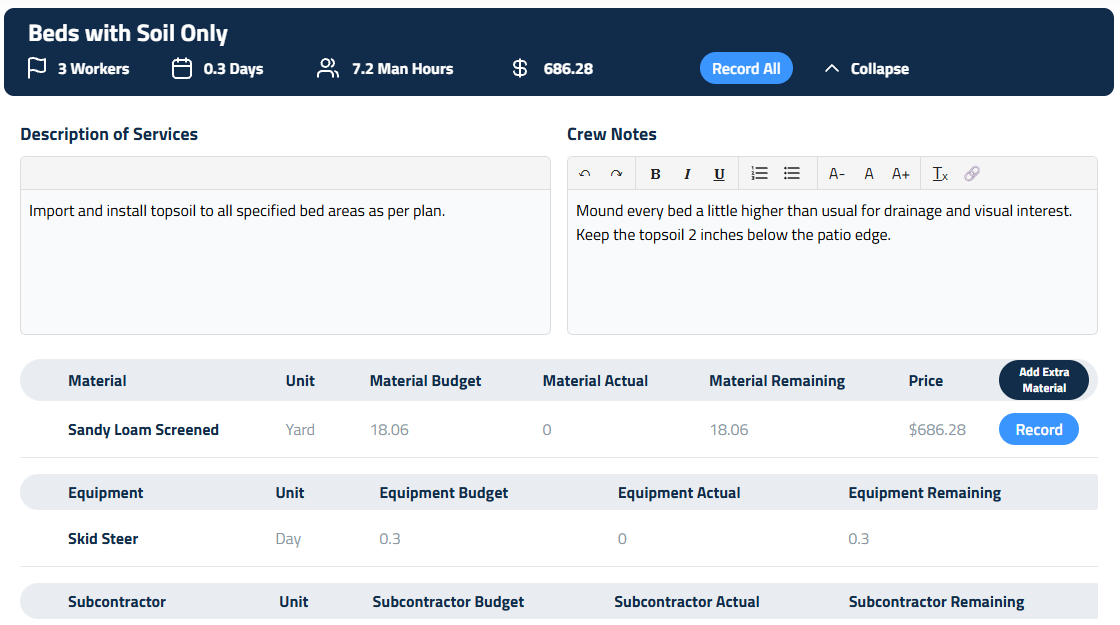
Below that is a list of project Sections, organized by Landscape Work Area. Each Section is collapsed under a header that displays:
- Crew size assigned
- Allotted time
- Total man-hours
Clicking on a section expands it to show all assigned materials, including:
- Units of measurement
- Budgeted quantities
- What's currently on hand
- What's still needed
Adding a Material to a Section
Jobs change once you're on site. If a section needs a material that wasn't in the proposal, you can add it right from the budget:
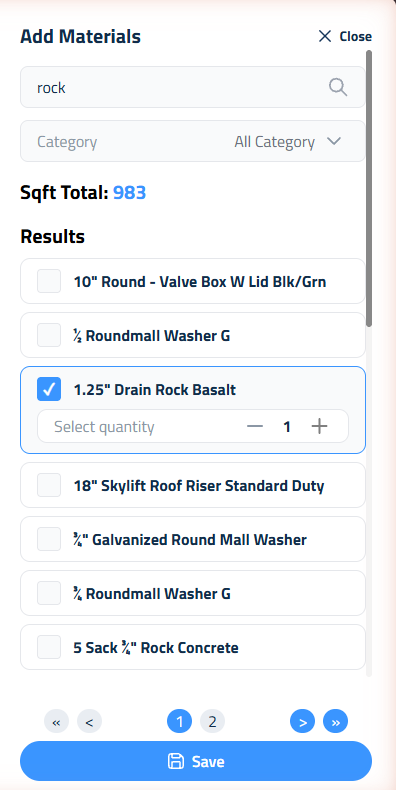
- Expand the section and click Add Extra Material in the material table header.
- The Add Materials sidebar opens with your catalog. Search by name, or narrow the list by Category, Sub Category, and Group.
- Check the materials you need and set a quantity for each one.
- Click Save.
The new material shows up in that section's material list, and you can order it with Record like anything else. Your vendor from the catalog comes along with it.

Subcontractors
If a section includes subcontracted work, a Subcontractor table appears under the materials. It shows each subcontractor's unit, budget, actual, and remaining amounts, so you can keep an eye on subcontracted work alongside your materials.
Ordering Materials
To add to your Supplier Call Sheet, click the Record button next to the material you need. A sidebar will appear where you can enter your values.
- Material Quantity: The full quantity of material needed (based on the proposal) is autofilled by the software, but it can be changed as necessary.
- Vendor name (auto-filled from your catalog): If there's no vendor assigned in the Catalog, you can enter it manually. If there is an associated vendor already, you can click the dropdown and select one.
- Delivery date
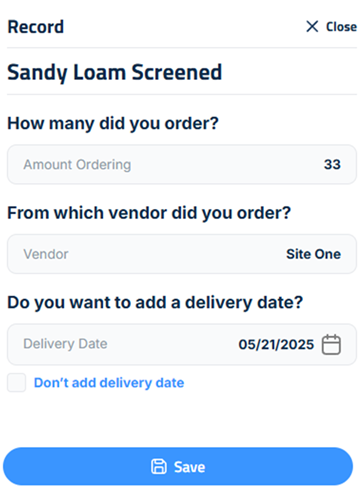
The system automatically fills in the full quantity required for the section, but you can split the order into multiple deliveries. If materials are ordered in phases, a plus sign will appear next to those items. Clicking it opens a log showing:
- Who placed each order
- How much was ordered
- Expected delivery dates
Ordering Multiple Items
To order multiple items for a section at once, click Record All. This opens a full list of materials for that section, allowing you to select which ones to order. As you check each box, the quantity needed will auto populate. When you enter a delivery date for the first item, it will be copied to the others for convenience, but you can adjust each one as needed.
Repeat this process as often as necessary. Every order is tracked automatically.
Supplier Call Sheet
The Supplier Call Sheet provides a centralized view of all materials that have been marked for ordering using the Record or Record All buttons. You can access this report by clicking Supplier Call Sheet in the top-right corner of the Project Budget screen.
This report includes the following columns:
- Order Date – When the order was placed
- Vendor – The supplier selected from your catalog
- Material – The item being ordered
- Material Budget – The total quantity budgeted for the section
- Delivery Date – When the material is expected to arrive
- Amount – Quantity being ordered in this entry
Each row represents the total amount being ordered for each material organized by delivery date and Vendor.
This report helps you track all pending and completed material orders across your project, making it easier to coordinate deliveries and ensure nothing is missed.
Use the check boxes to mark off what you've handled. There's a check box in the table header if you want to check or uncheck every row at once. Keep in mind, checking items off your list does not order them. On its own, the Supplier Call Sheet is for recordkeeping only.
You can also click Print Report to print the call sheet exactly as it appears on screen.
Emailing an Order to Your Supplier
When you're ready to actually place the order, click the Email button on the Supplier Call Sheet. Elevation Advisor sends the order for you, so there's no copying material lists into your email app and no phone tag with the yard.
A list of your suppliers opens. Each one shows a number for how many items on the call sheet belong to them, so you can see at a glance who you still owe an order. A supplier with nothing left to order is greyed out.
Click a supplier and the send window opens. Elevation Advisor prefills the address you used the last time you emailed that supplier, so a repeat order is usually one click and Send.
- More than one recipient: type additional addresses separated by commas or semicolons. You can send to up to 10 addresses on a single order, which is handy when you want the yard's dispatcher and your own office copied.
- Replies come back to you: the email goes out under your business name, and both the reply address and a copy are set to your own inbox. You get a record of the order in your email, and when the supplier writes back it lands with you, not in a no-reply void.
Click Send and the order is on its way.
What Your Supplier Receives
The subject line is your company name followed by "Material Order," so it's recognizable in a busy inbox.
The email opens with a greeting to the supplier by name, then a short header block so they can scan the job at a glance:
- Client
- Project
- Job Site (the full project address)
- Delivery Date (shown here when everything on the order lands on the same day)
Below that is the material list. Items are grouped by delivery date with the soonest date first, and anything that doesn't have a date set yet comes last under its own heading. Each line shows the material, the amount, and the unit in clean, lined-up columns.
The email closes with your name, your business name, and your phone number. If you don't have a personal phone number on your Elevation Advisor account, your business phone number is used instead.
Tracking What You've Already Sent
Every order email is recorded, so nothing goes out twice by accident and nobody has to ask "did anyone call the rock yard?"
- A green check appears next to any supplier you've already emailed for this project.
- Underneath is a line showing when the last order went out and who it went to, for example "Sent Aug 12, 3:40 PM."
- Click that line to expand the full history for that supplier. You'll see every send, with the exact items and amounts that were in each one.
Suppliers keep their history even after their items clear off the call sheet, so the record stays with the project.
Back on the call sheet itself, any row that has gone out in an email is tagged with a green Emailed badge. That gives you a quick read on which lines are handled and which are still waiting on someone.
Updated on: 09/17/2026
Thank you!