Using the Takeoffs Screen
Let’s start with a quick note on why we built this screen the way we did.
We wanted it to be clean, easy on your eyes, and enjoyable to work in. Everything is collapsible so you can stay focused and avoid that overwhelming feeling of too much on the screen at once. The goal is to help you stay locked in on one section at a time,
complete it, collapse it, and move on.
Now let’s walk through how to navigate this page.
Navigating the Takeoffs Screen
When you first open this screen, you will see your landscape work areas like the Patio Area and the Garden Area in our example. Each work area has a list of sections beneath it, and they’ll all be collapsed by default to keep things tidy.
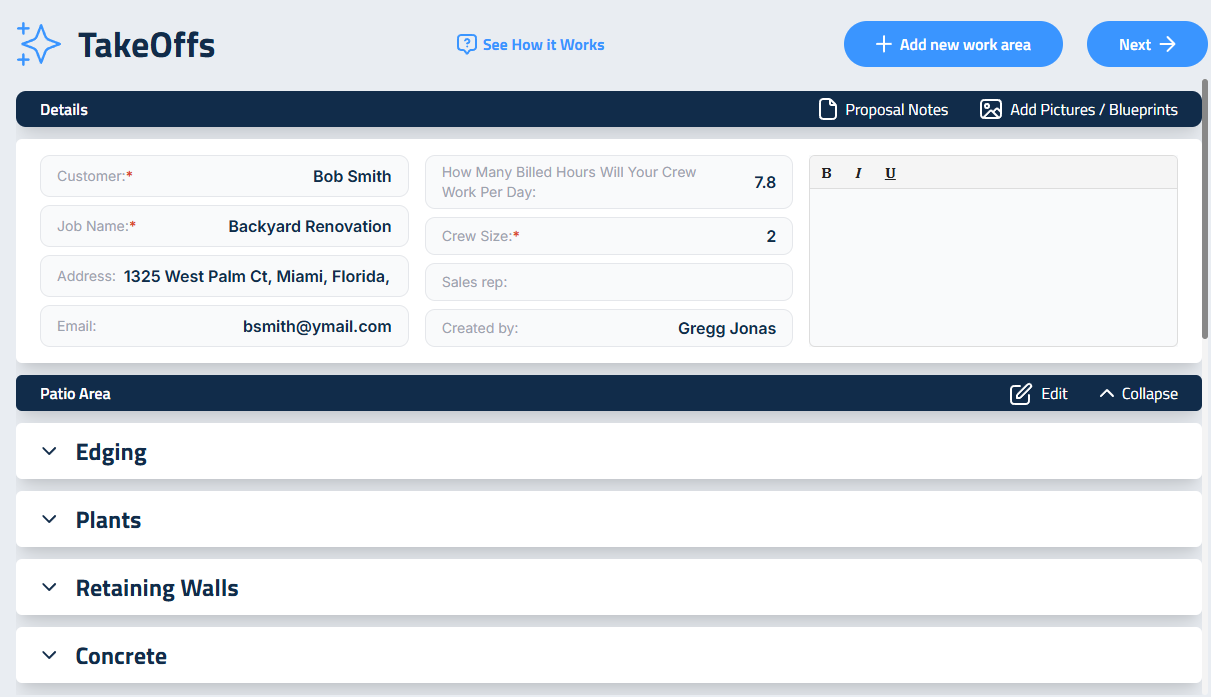
Click the top of the section or arrow icon to the left of any section to expand it. Click it again to collapse it. You can also collapse or expand the entire work area
using the “Collapse Area” button on the far right.
Editing Landscape Work Areas
If you click the Edit button for any work area, you can do a few things:
- Rename the work area
- Add or remove sections
- Delete the work area entirely
- And group multiple sections together using a custom group, which we’ll go over in a moment
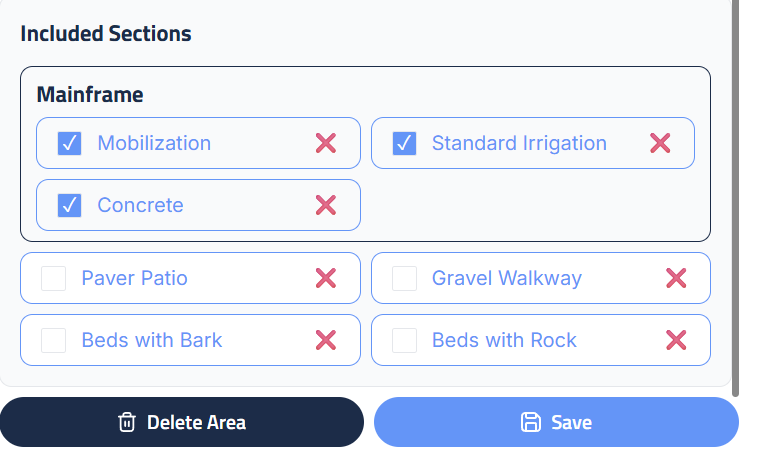
To remove a section, just scroll to the bottom of e sidebar and click the red X next to the one you want to remove. To add a section, click on the name in the Section Library and it will move into the Included Sections area below.
To rename a work area, click “Edit Name” at the top of the edit sidebar, type in the new name, and hit Save. And to delete a work area entirely, scroll to the very bottom of the sidebar and click Delete Area. This will remove the entire work area and all of its included sections from the proposal.
And remember, after making any change here, you will need to hit Save for those changes to take effect.
Organizing Templates
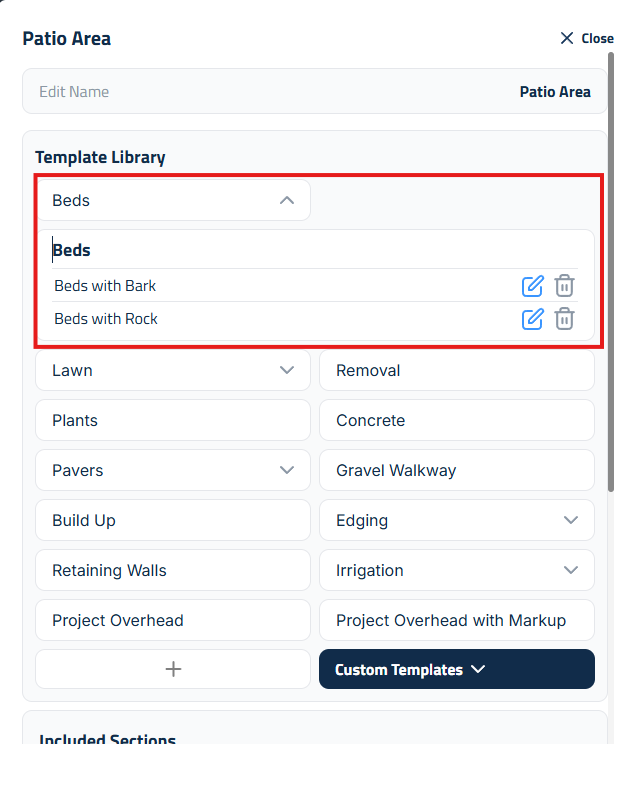
For example, templates for Beds might include:
- Beds with Bark
- Beds with Weed Fabric and Rock
Templates for Lawn might include:
- Lawn with Sod
- Lawn with Hydroseed
Once you’ve created and saved those templates, they’ll show up in the dropdown for that section. For any custom templates that don’t fall into a standard category
like Water Features, Fire Pits, or Raised Garden Beds, you will find those under the Custom Templates button.
If you don’t see a template where you expect it, it probably hasn’t been saved yet.
Reordering Sections
You can rearrange your sections by simply clicking and dragging them. For example, you want Removal listed before Build-Up, just drag it up. This gives you full control over the flow of your estimate and keeps your process smooth.
Now for this example bid, we’re going to organize the sections in the order we plan to teach and present them not necessarily install order. We’ve arranged them here in the order that we teach but think about how you want to present each section to your client. The order you use here will be how it is displayed to your client.
Creating Custom Groups (ISPS System Feature)
Custom Groups are one of the most strategic tools within Elevation Advisor’s ISPS system (Integrated Sales Psychology and Strategies). They allow you to bundle multiple proposal sections into a single group that displays a lump sum price to the client, ideal for streamlining presentation and focusing on outcomes rather than itemized costs.
Purpose & Client View
- Each section within the Custom Group remains visible to the client.
- Pricing is shown as a single combined value, no individual line items are listed.
Let’s walk through creating a Custom Group using the following sections:
- Beds
- Lawn
- Build-Up
- Removal
- Project Overhead
- Irrigation
How to Build It
Select Sections
- Click the checkbox next to each section name you want to include.
- As you select them, they’ll automatically move into the Custom Group area at the top of your proposal workspace.
Rename the Group:
- Double-click the Custom Group header to rename it.
- In this example, we’ll name it Mainframe, but feel free to choose a name that matches your branding, internal terminology, or client communication style.
Save Your Changes:
- After entering your custom name, press Enter and then click Save to finalize and lock in the group.
Renaming Proposal Sections for Style and Branding
Customizing section names helps align your proposals with your brand voice, internal language, and how you communicate value to clients. Let’s walk through renaming a section using Project Overhead as our example.
How to Rename a Section
Expand the Section:

- Click the arrow next to Project Overhead on the left-hand side to open the section panel.
Edit the Section Name
- At the top of the panel, double-click the name Project Overhead.
- Type in your preferred name, for this example, we’ll use Mobilization, which feels more professional and client-oriented.
Confirm the Update:
- Once renamed, the new title will automatically update across the proposal view.
From expanding and collapsing sections to renaming and reordering, Elevation Advisor is designed to keep you focused and in control, one step at a time.
Updated on: 11/06/2025
Thank you!