How to Add Materials
This catalog is where you define the products your crews install, how much they cost, and how long they take to install. Once this is done, your proposals will practically build themselves.
Let’s walk through the process together.
Step 1: Add a Single Product
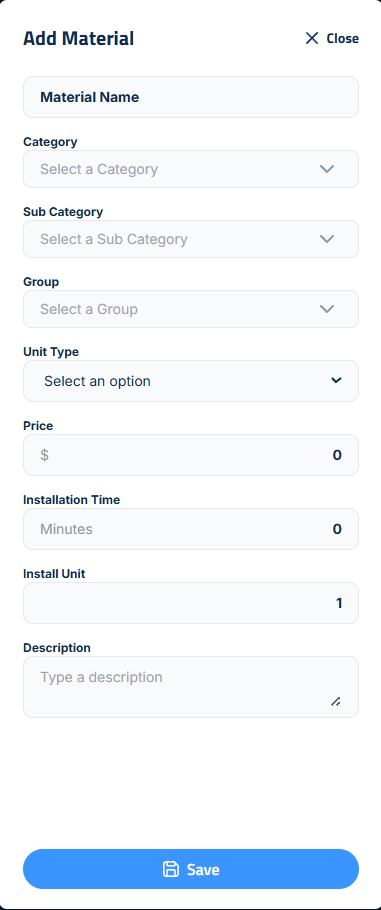
To add a custom product individually, click Add Single Product. This opens a sidebar where you can enter the name of the product and categorize it from broad to specific. This structure makes it easy to search and organize later.
To create a new Category, type the name and press Enter. This saves the category for future use. The same process applies to Subcategories and Groups.
For example, you might name your item Gas Fittings, then create a:
- Category: Irrigation/Plumbing
- Subcategory: Fittings
- Group: Gas
Next, select a Unit Type from the list (like Pounds, Yards, or Each), and set the Unit Price.
Finally, enter the Install Time and Install Unit for the material. These two fields work together:
- Install Time is the total number of minutes it takes a crew to install the quantity defined in the Install Unit.
- Install Unit is the number of units (e.g., square feet, yards, each) that the Install Time applies to.
For example, if your crew can install 100 square feet of pavers in 60 minutes, set:
- Install Time = 60
- Install Unit = 100
Install Unit helps eliminate the need to break install time into small decimals. Instead of saying your crew installs 1 square foot in 0.6 minutes, you can simply say they install 100 square feet in 60 minutes, making your catalog easier to read, manage, and update. Elevation Advisor will automatically calculate the labor time per unit and apply it to future proposals.
In the **Vendor **box, you have the ability to list multiple vendors for each product by typing their name and then adding a comma. This will create a saved list of vendors from which you can buy this product. This will allow you to easily choose which vendor you want to buy the product from when ordering materials.
If desired, you can add a description of the product in the Description **box.
Click Save to add the product to your catalog.
Step 2: Bulk Import Materials (Recommended)
If you have a long list of materials, we recommend using the bulk import feature. It’s faster and helps you standardize your catalog.
Start by clicking Import Materials List, then download the CSV Template and open it on your computer.
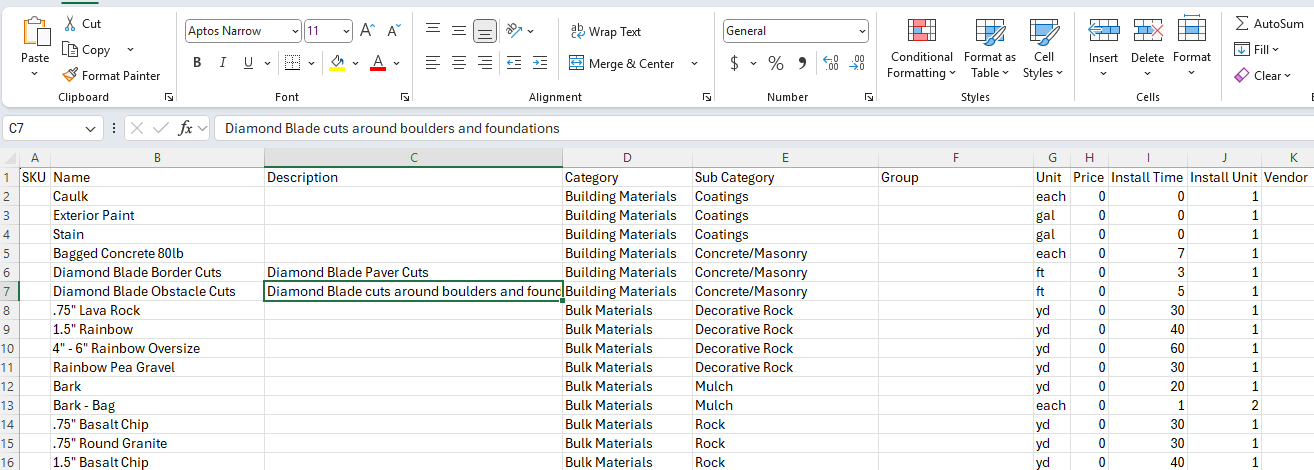
The spreadsheet includes columns for:
- SKU
- Item name
- Description
- Categories (Category, Subcategory, Group)
- Unit of measurement
- Unit price
- Install time (in minutes for a two-person crew)
- Install Unit
- Vendor
You can adjust the categories to suit your business, but be sure to keep the format of the file intact for a smooth upload.
If you’re unsure about install times, don’t worry. The software can calculate them based on your overall project time, and you can save those times to the catalog for future use.
How to Add Rental Equipment in Elevation Advisor
Rental equipment is not owned by your company, so it doesn’t follow the standard cost-recovery model used for owned equipment in Elevation Advisor. Here’s how to correctly add rental equipment so it bills accurately and cleanly.
This method lets you bill a fixed rental rate directly in your proposal.
Fill out the fields:
- Name: Mini Excavator Rental – Sunbelt
- Category: Equipment Rentals
- Unit Type: Day
- Unit Price: $275 (or your rental rate)
- Install Time: 0 (unless you want to account for coordination time)
Once in your catalog, you can add rental equipment to any section of your proposal just like any other material.
After your spreadsheet is complete, upload the Completed File:
- Return to Catalog Materials
- Click Import Materials List
- Select your completed CSV file and upload
Elevation Advisor will process the file and add your materials to the catalog. You can edit or update items later using the three-dot menu next to each material.
Your materials will be saved and ready to use in proposals. You can always edit or add more later.
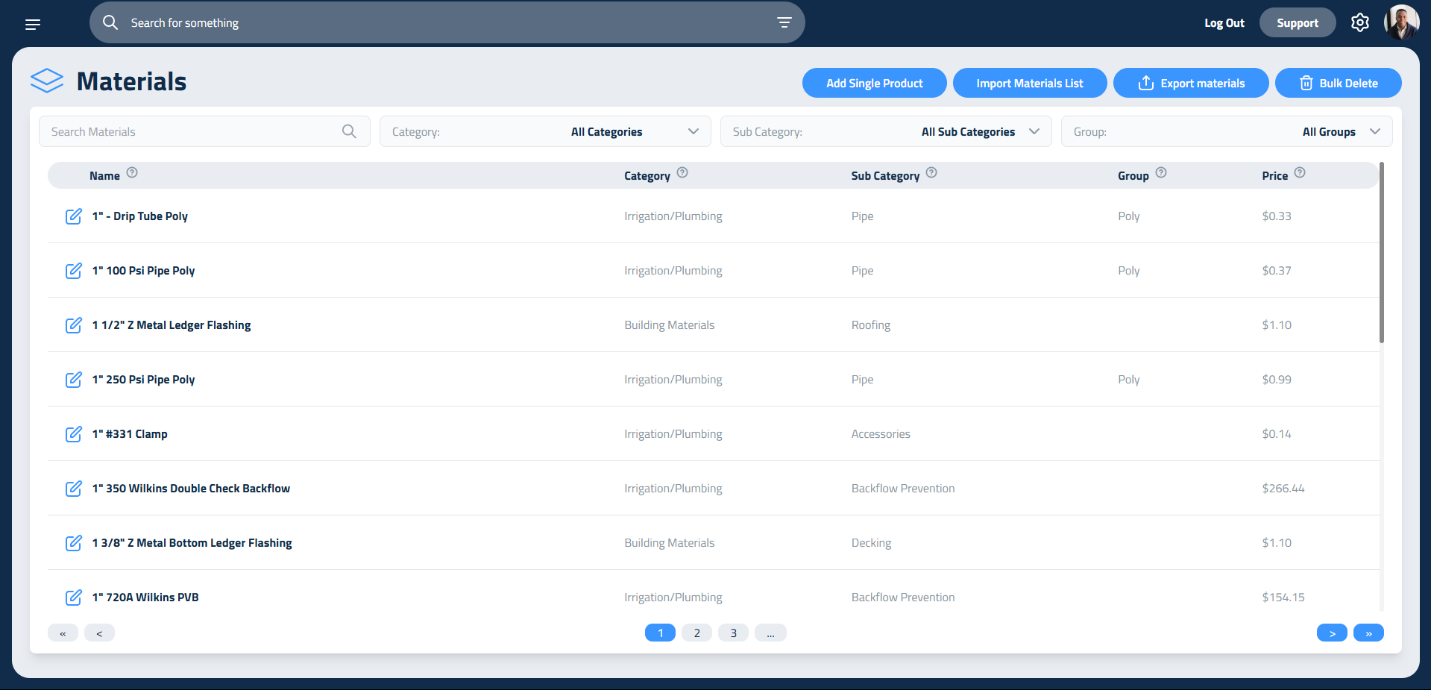
Step 3: Navigating and Editing Your Catalog
To find materials in your catalog, use the Search Materials bar or filter by Category, Subcategory, or Group using the dropdown menus.
You can edit any item by clicking the three-dot menu next to it. This allows you to update pricing, install times, or descriptions as needed.
Managing different crew sizes
If you use different crew sizes for different jobs, duplicating materials with unique install times is a powerful strategy. This ensures accurate labor calculations and keeps your pricing aligned with your PMM goals.
For example:
- A three-person crew might install 100 square feet of pavers in 40 minutes.
- A two-person crew might take 50 minutes for the same task.
By creating separate materials like Pavers_2Crew and Pavers_3Crew, you can:
- Ensure accurate scheduling
- Maintain consistent profitability
- Speed up proposal creation
- Build trust with clients through precise estimates
How to Duplicate Materials for Crew Sizes
- Go to Catalog Materials
- Click Add Single Product
- Name the item clearly (e.g., “Pavers_2Crew” or “Pavers_3Crew”)
- Set the Unit Type (e.g., Square Feet)
- Enter the Install Time based on your field-tested data
- Click Save
Updated on: 01/09/2026
Thank you!