Preparing and Sending Your Proposal
Once your work areas, sections, and packages are built, click Preview in the top right corner of the Package Creation screen. This opens your proposal exactly the way your client will see it, and it's also where you finish it: add your photos and personal note, set the payment terms, and send it.

Everything on this page saves as you go. Click away from a box or press Enter, and a small status chip shows Saving… and then Saved. There's no Save button to remember, except for your colors and your contract sections.
Need to change a measurement, a material, or a package? Click Go back to return to the packages step. If you have unsaved photo, text, or media changes, you'll be asked before you leave.
Make It Yours
A proposal that looks like it was built for this client closes better than one that looks like a price sheet. Everything you can change is right on the page. Click it and edit.
Dates
At the top, the proposal shows Prepared with today's date and Pricing valid through a date 30 days after you send it. Click the prepared date to change it.
Photos and video
- Hero photo: click Add a hero photo to put a big photo across the top of the proposal. Use Replace or Remove to change it later.
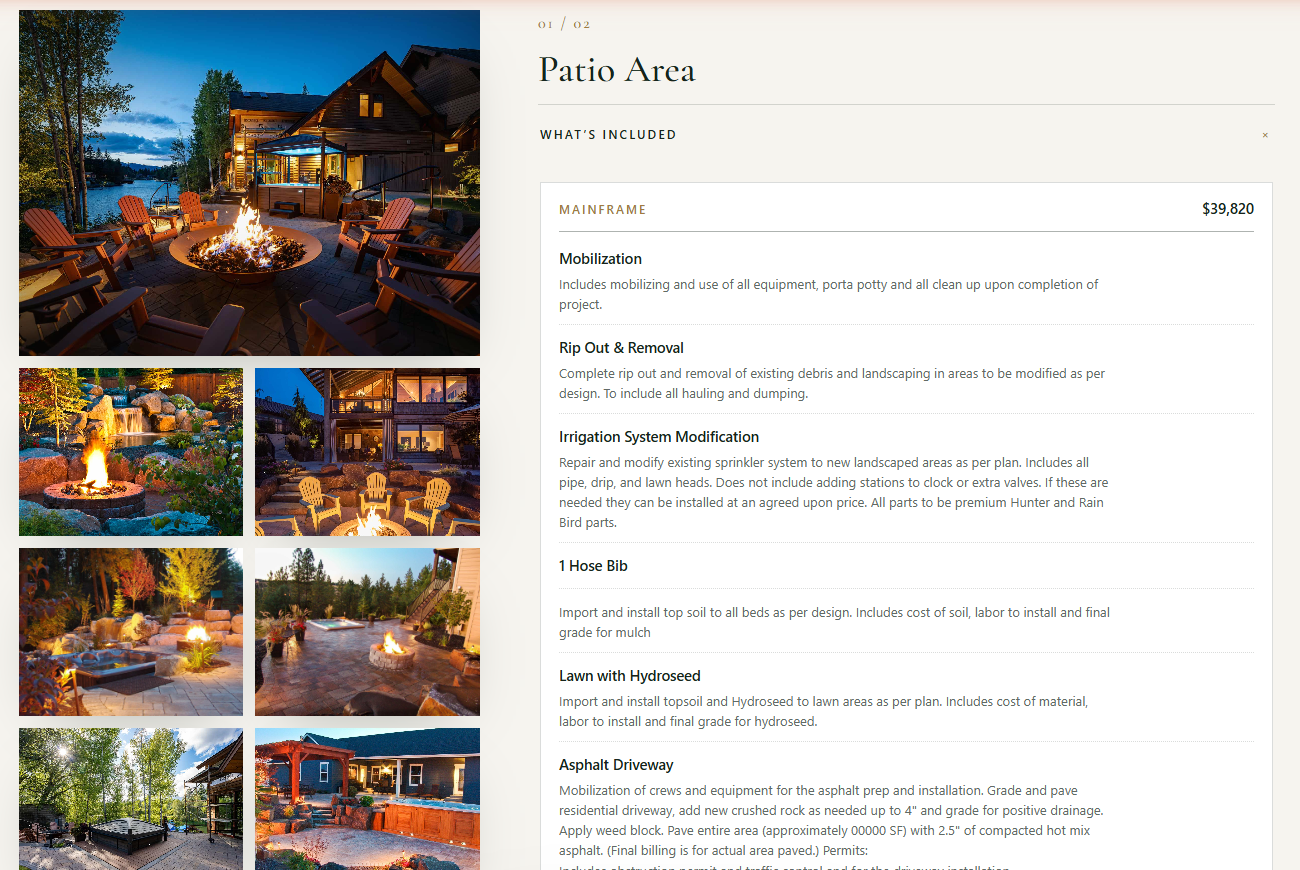
- Area photos: under each work area, click Click to add photos, or the + tile to add more. Drag photos to reorder them. The first photo shows large. If you want to remove a photo, just click the x in the top right corner
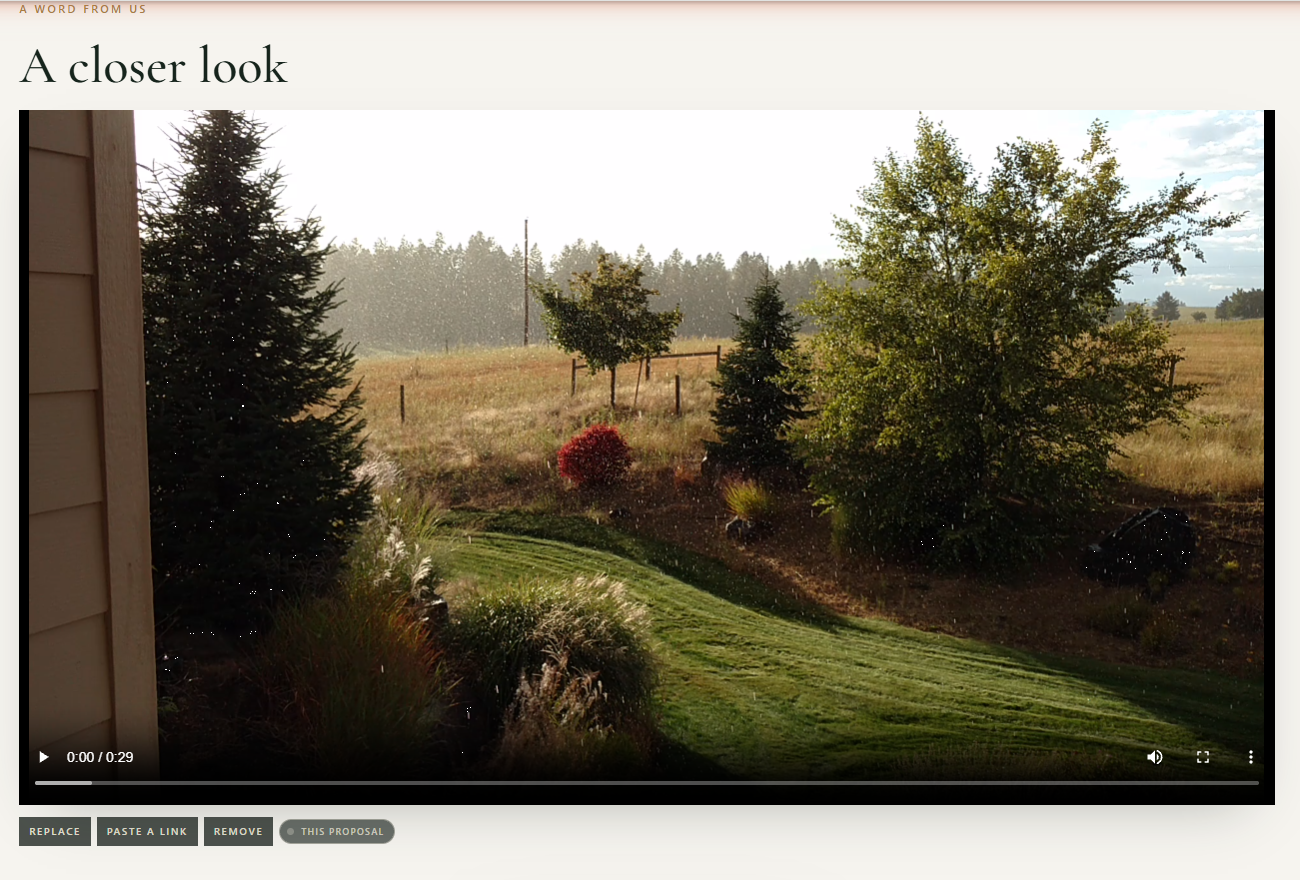
- Video: click Add a video to upload one, or Paste a link to use a YouTube, Vimeo, or Loom video. Those play right on the page. Any other link becomes a Watch the walkthrough button.
Photos can be up to 20MB and videos up to 200MB.
A note before the numbers
The personal note sits right before the pricing. Write a few sentences to your client, add your name and your role (for example, "Owner, 20 years in the field"), and sign your first name. Click Add portrait to include your photo.
Keep it short. If the note gets long enough to push the cover onto a second page, you'll see a warning.

Headings and intro text
You can reword the headings and intro paragraphs for the scope, the packages, the "Your investment, in plain terms" section, and the contract. Package names, task descriptions, and your company details come from your proposal and your account settings, so change those at the source.
This proposal or all proposals
Some items (the hero photo, your portrait, the video, the personal note, and the contract heading) have a small switch that reads This proposal or All proposals.
- All proposals means you're using your company's shared version. Change it here and it becomes the new default for future proposals.
- This proposal means this client gets their own version, and nothing else changes.
A new proposal always starts from your latest company settings. Once you change something on one proposal, that proposal keeps its own copy, so proposals you've already sent never change behind your back. If you switch an item to All proposals when a shared version already exists, you'll be asked to confirm, because that replaces the shared version and can't be undone.
Customize
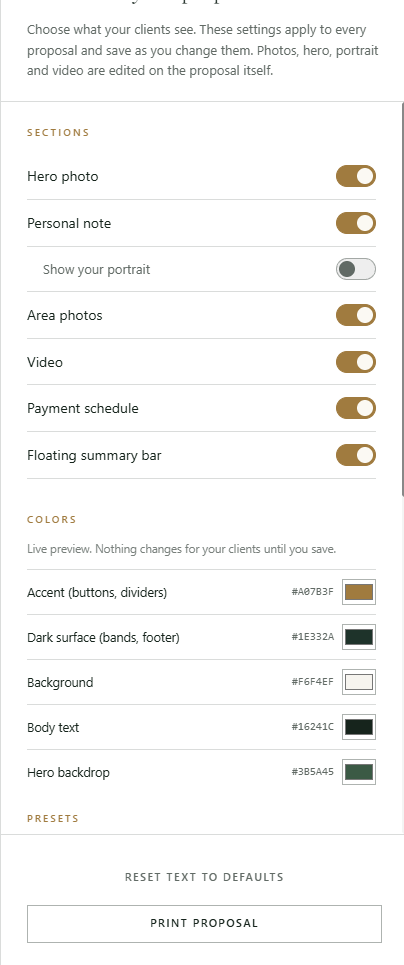
Click Customize to open Customize your proposals. From there you can:
- Turn sections on or off: Hero photo, Personal note (and Show your portrait), Area photos, Video, Payment schedule, and Floating summary bar.
- Pick your colors, or start from a preset, then click Save for all customers. Discard changes puts them back.
- Choose what sits Behind your logo: Auto, None, Darken, or Lighten.
- Reset text to defaults if you want to start your wording over.
- Print proposal for a paper copy.
Packages
Your packages appear under Your options (or Your investment if there's only one). Each card shows the package name, how many services are included, a What's included checklist, and the price, sales tax, and total. Packages that total $0 are hidden.
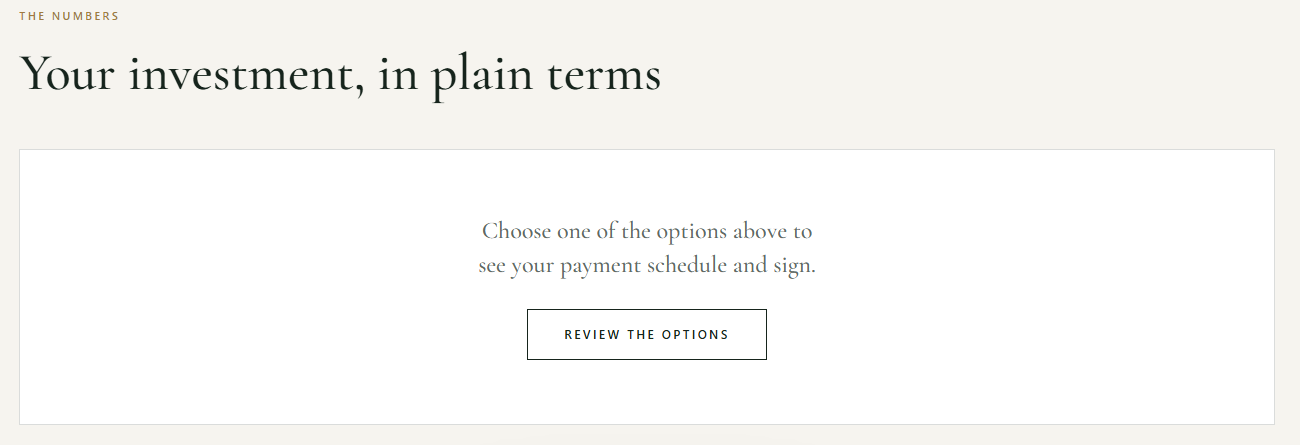
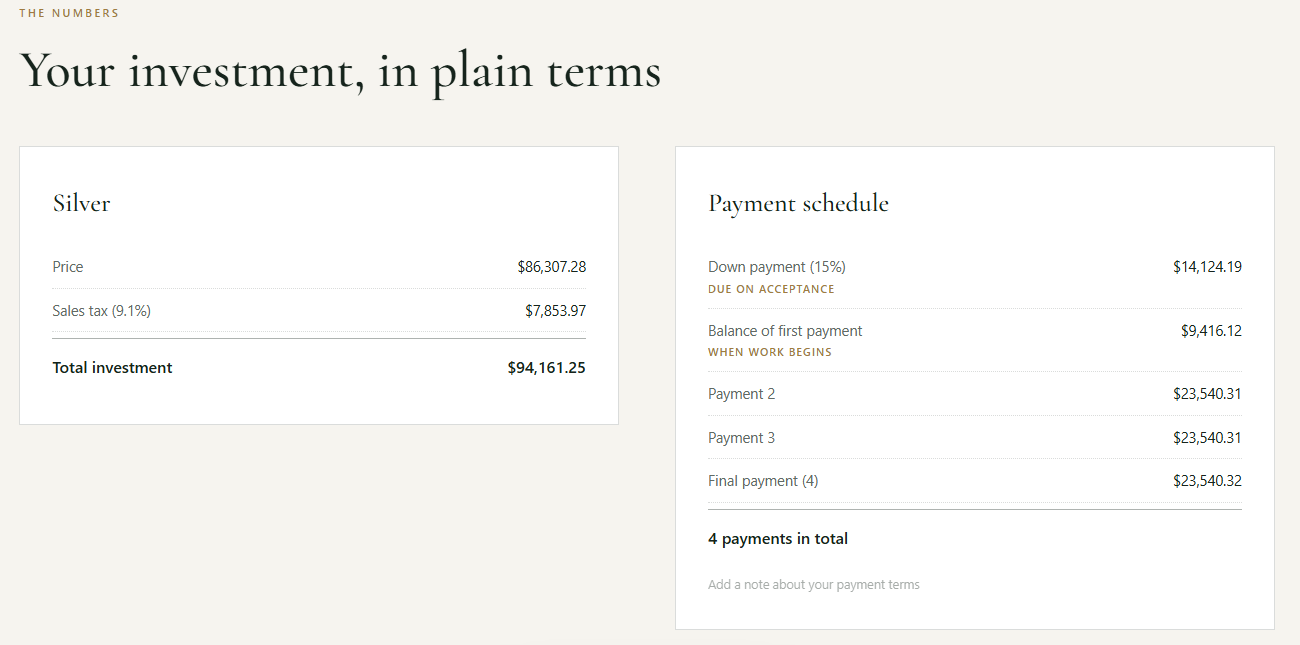
No package is selected when your client opens the proposal. They compare the cards and click Select this option on the one they want. Until they do, the summary at the bottom asks them to choose an option, and the payment schedule and signature box stay hidden. Once they pick, the summary shows the Price, Sales tax, and Total investment, and a floating bar keeps their choice in view as they scroll.
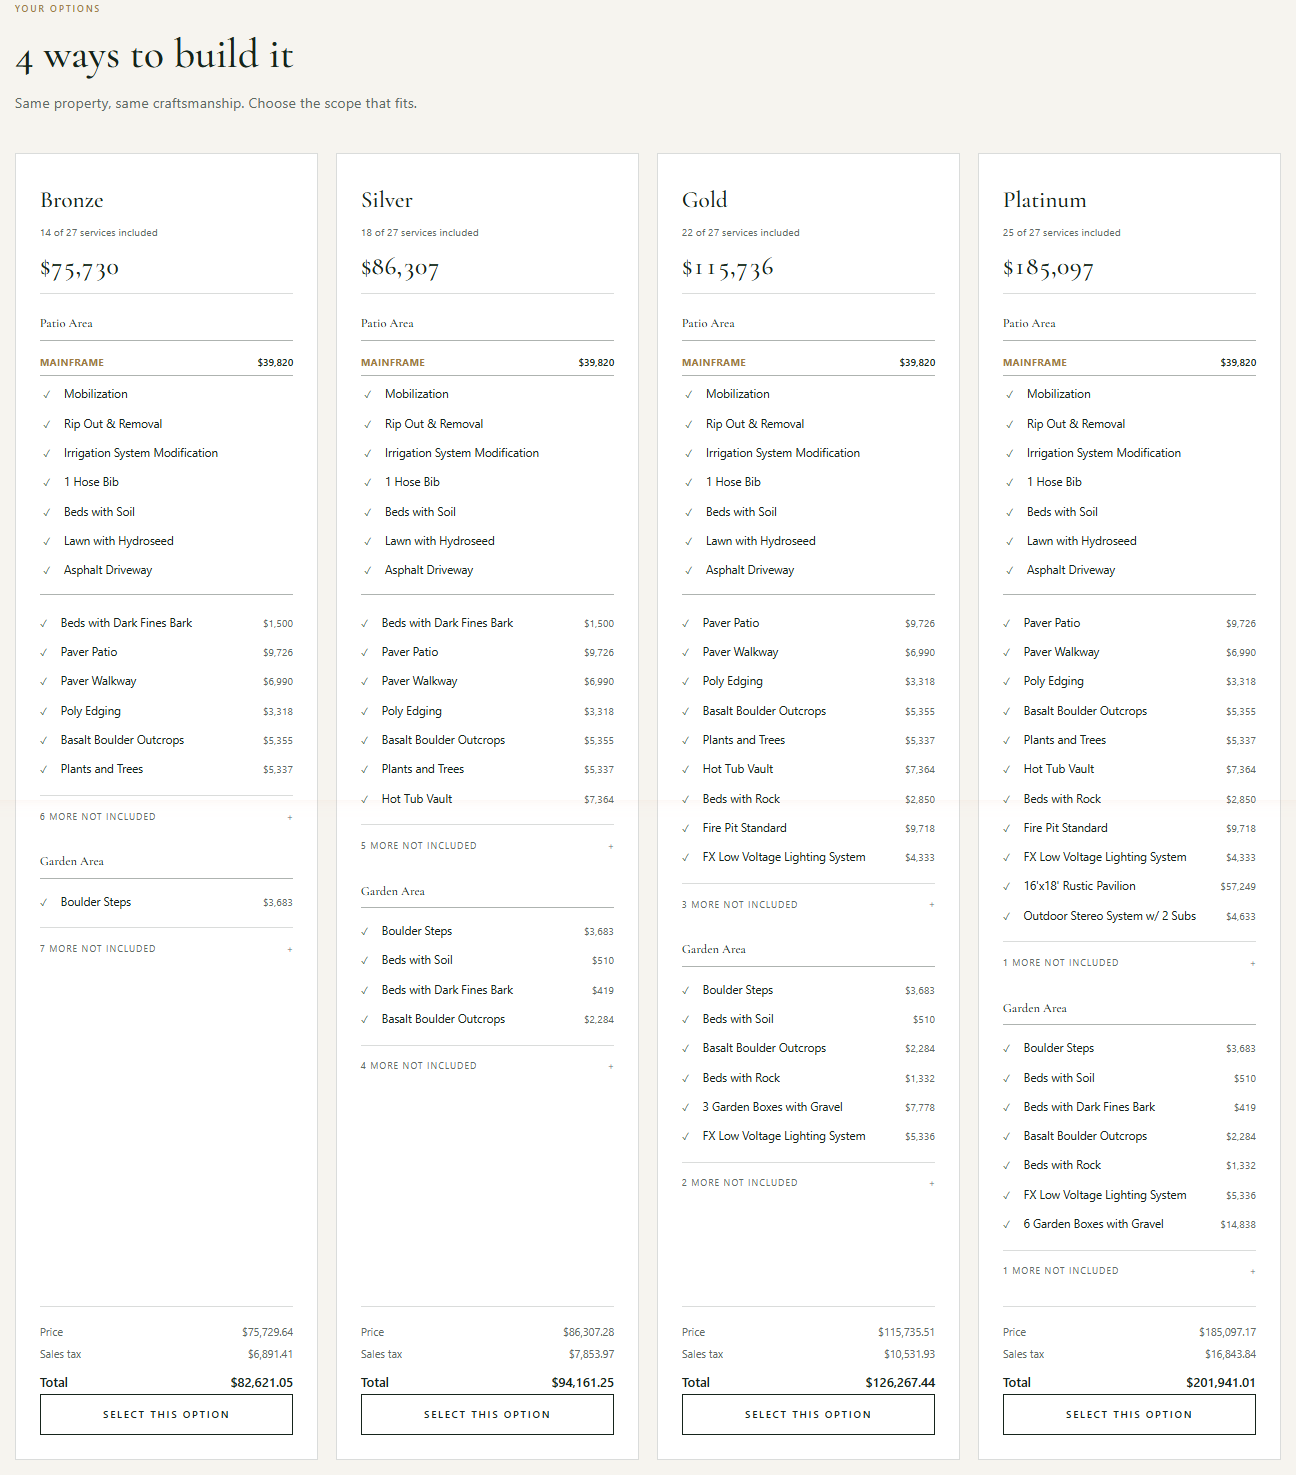
This layout is built around Integrated Sales Psychology and Strategies (ISPS): clear, side-by-side options make it easy for clients to choose with confidence.
Payment Terms
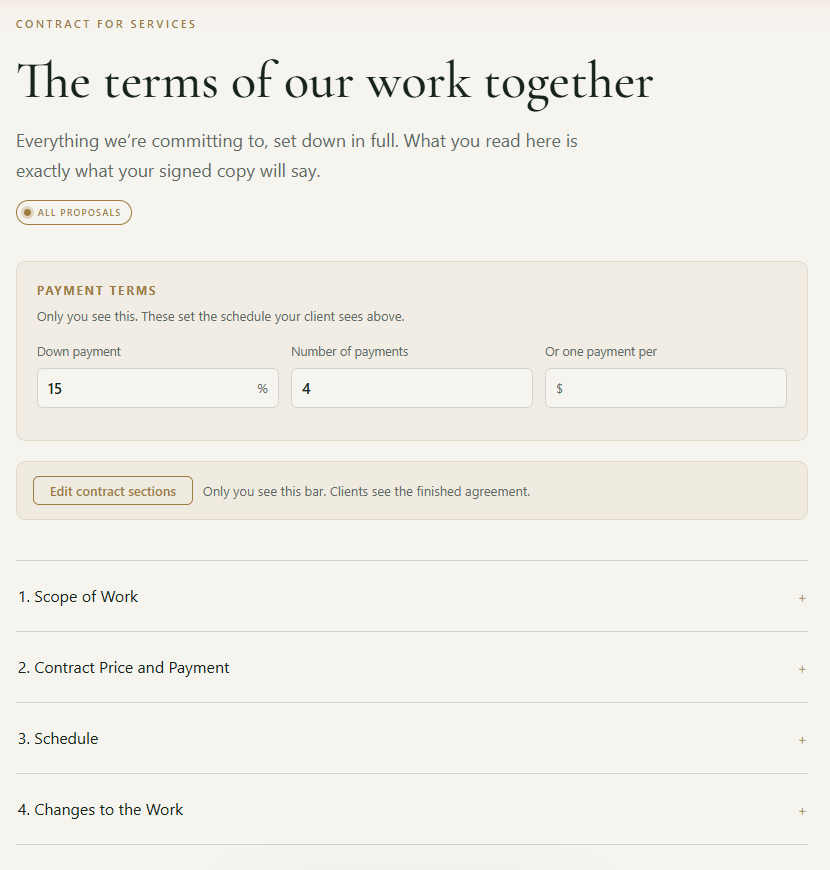
The Payment terms panel is only visible to you. It sets the schedule your client sees.
- Down payment: the percentage due when the client accepts. 0% is allowed.
- Number of payments: how many payments the project is split into.
- Or one payment per: instead of a count, enter a dollar amount (for example, one payment per $10,000). Elevation Advisor works out the number of payments for whichever package the client picks, between 1 and 24.
Use one or the other. Typing a number of payments clears the per-payment amount.
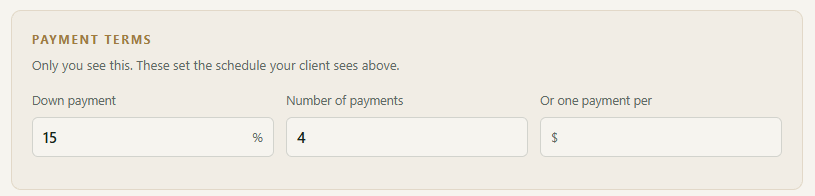
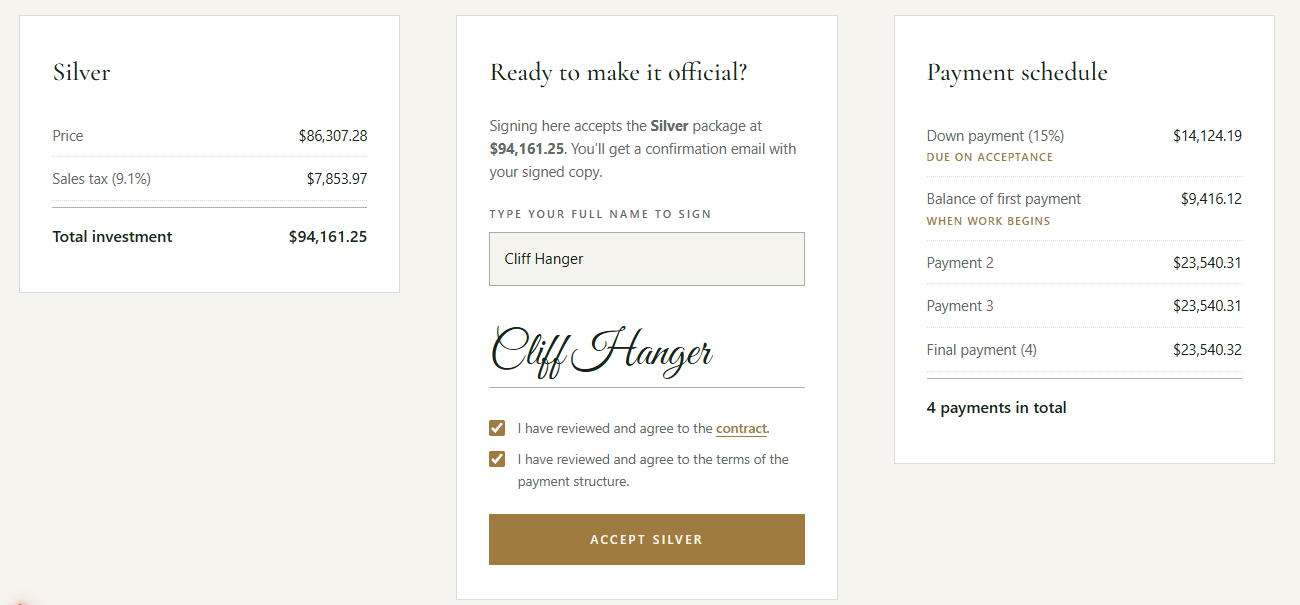
For example, on a $100,000 project with a 15% down payment and four payments, the client pays $15,000 when they accept, and the remaining $85,000 is spread across the payments. Elevation Advisor handles the rounding so the schedule always adds up to the total, to the cent.
Your client sees a Payment schedule card with each payment spelled out: the down payment due on acceptance, the balance of the first payment when work begins, the payments in between, and the final payment. You can also add a note about your payment terms under the schedule.
Your Contract
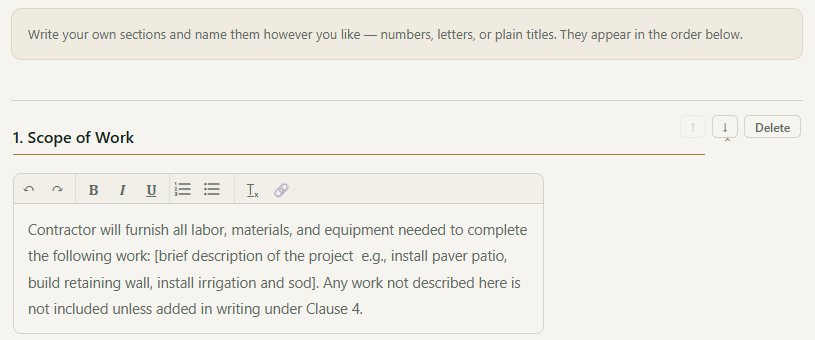
Click Edit contract sections to write or update the contract that appears at the bottom of the proposal.
- Give each section a title (number or letter it however you like) and its text.
- Use the arrows to reorder sections, Delete to remove one, and + Add a section to add another.
- Check Also use these sections on all proposals to make this your new default contract. You'll be asked to confirm before it replaces your current default.
- Click Save contract when you're done.
Once the client signs, the contract on that proposal is locked.

Sending Your Proposal
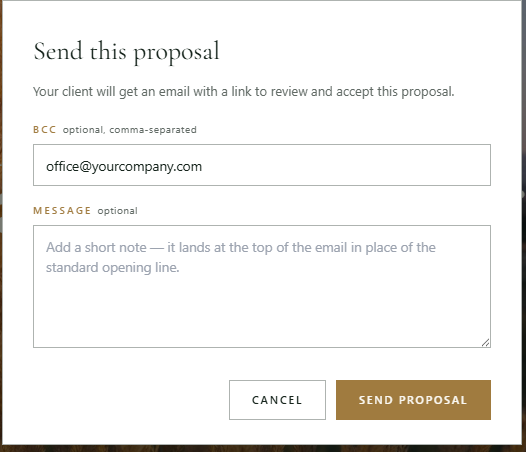
When everything looks right, click Send at the top of the page. In the Send this proposal window:
- BCC (optional): add your own email address, or anyone else's, to keep a copy. Separate multiple addresses with commas.
- Message (optional): a short note that replaces the standard opening line of the email.
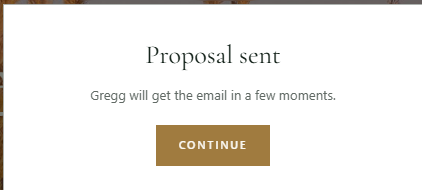
Click Send proposal. You'll see Proposal sent, and your client gets the email in a few moments. Click Continue to go back to your proposal list.
Your client's email has the subject "Your Proposal from your company - project name is Ready for Review", your message, the prepared and pricing-valid dates, and a View your proposal button. It doesn't include prices. Those are on the proposal, where the client can compare the options.
What Your Client Does
- Opens the proposal from the email and reviews the scope, photos, and options.
- Clicks Select this option on the package they want.
- Reviews the payment schedule, then scrolls to Ready to make it official?
- Types their full name to sign, checks the two boxes agreeing to the contract and the payment structure, and clicks Accept package name.
They land on a confirmation page that shows what they accepted, the down payment due to schedule the project, and where to send payment, with buttons to review or print the signed proposal. They also get a confirmation email, and you get a notice that they said yes. A signed PDF is created automatically.
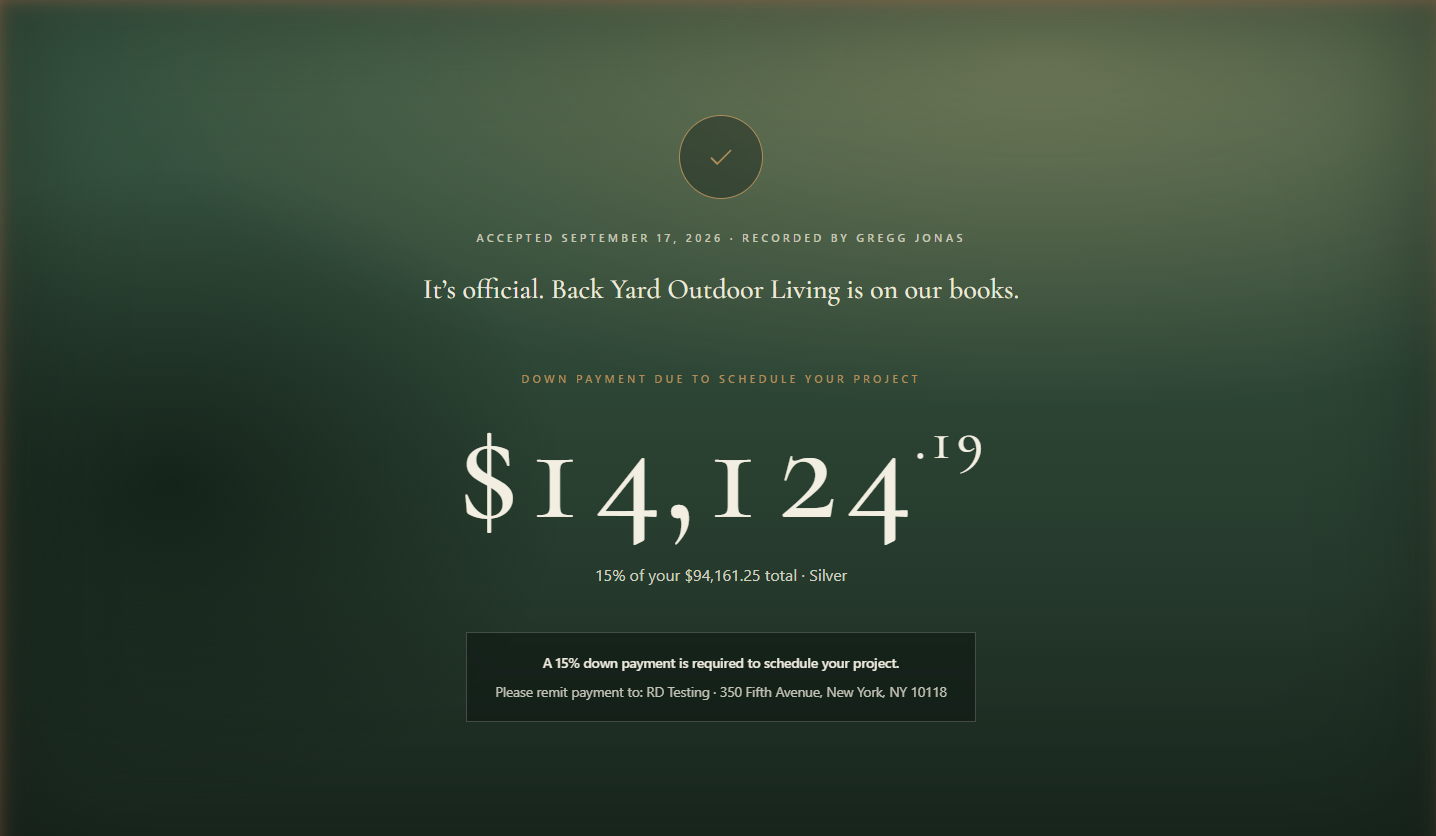
There's no decline button on the proposal. If a client passes, they'll let you know, and you can mark it with Reject Proposal on the Proposals page.
Moving up to a bigger package
After signing, the same link still works. The accepted package shows as Your current option, and the others offer Move up to this or Change to this. If the client moves up, Elevation Advisor creates a package-update change order automatically. See Upselling with the Update Package Feature.
Once a regular change order exists on the project, online package changes are turned off, and the client is asked to contact you instead.
Change Orders
Change orders use the same page with change-order wording: a Change order badge, a What's changing on your project section with Added and Removed tags, and Approve this change? where the client signs.
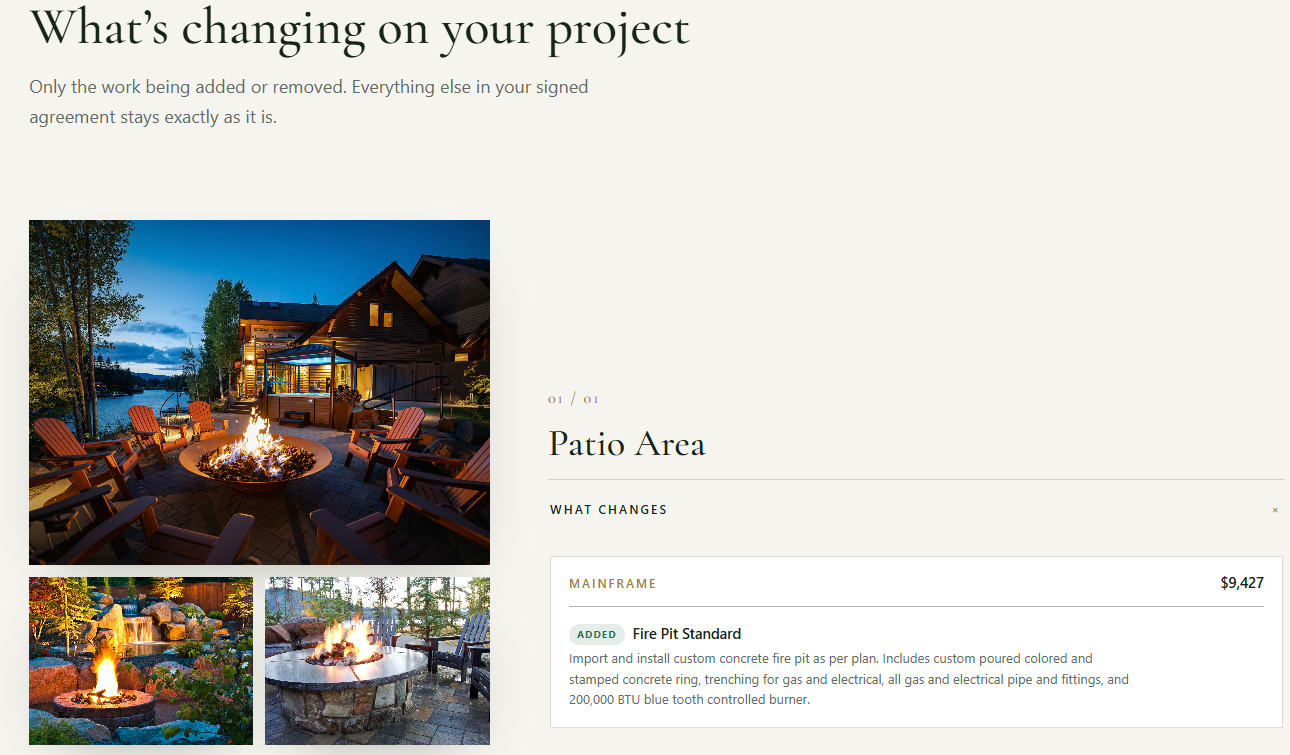
The payment terms panel shows Billed to date and Remaining payments from the original contract (read-only), plus a Down payment and Additional payments (or Or one payment per) for the change itself. The client's email says their change order is ready to review, with a Review the change order button.
In-Person Presentation: Building Trust and Connection
Email works, but we strongly recommend presenting the proposal in person whenever you can. It elevates your presentation and unlocks the full power of ISPS.
Face-to-face presentations build trust, let you answer questions in real time, and guide clients through their options with confidence. When clients see you've taken the time to meet with them, they feel valued. That personal attention taps into rapport, reciprocity, and reassurance, which are proven to increase close rates and client satisfaction.
Walk clients through the photos, the video, and the differences between packages, and help them picture the result:
- Hosting family gatherings on a new patio
- Enjoying low-maintenance landscaping
- Creating a space that reflects their personal style and priorities
These emotional anchors make higher-tier packages feel more compelling and attainable.
Why In-Person Presentations Work
- Builds trust through eye contact, tone, and body language
- Reduces uncertainty by allowing real-time Q&A
- Reinforces professionalism and attention to detail
- Creates space for guided decision-making using ISPS
- Increases likelihood of selecting mid- or premium-tier packages
Signing on the spot
When your client is ready to move forward during the meeting, send the proposal first, then go to the Proposals page and click Client Accept next to it. That opens the client's view of the proposal so they can pick a package and sign right there, and you can lock in their spot on the calendar before you leave. If they've already said yes and you'd rather not send anything at all, select their package and click Accept for client at the top of the proposal instead. The proposal is accepted without any emails going out. See Client Sign-Off.
Updated on: 09/17/2026
Thank you!